Introduction
Diamond painting is one of those hobbies that looks wonderfully relaxing right up until you have three unfinished canvases, several containers of colorful drills, a pile of reference sheets, and absolutely no idea which project you promised yourself you would finish first. That little craft table can become a command center faster than you can say, “Where did I put that bag of 310?”
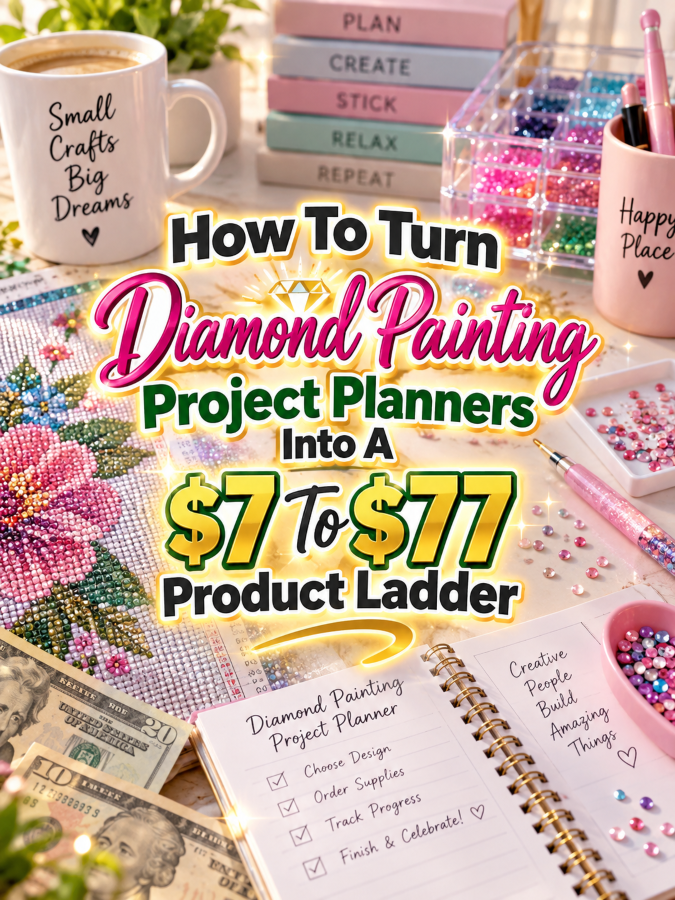
That organization problem creates a useful opportunity for digital product creators. A Diamond Painting Project Planner can start as a simple $7 printable that helps a crafter organize one project. Then you can expand it into a larger planning kit, a complete project management bundle, and finally an editable premium studio system. The trick is not adding 97 nearly identical pages just so the PDF looks chunky. The trick is adding useful tools that make the hobby easier to manage.
This is exactly where a product ladder makes sense. Each price level solves more of the buyer’s problem. The customer who only needs a simple project sheet can start at $7, while the serious hobbyist with multiple works in progress may want a much more complete system.
Quick Answer
A $7 to $77 Diamond Painting Project Planner ladder can begin with a simple printable for tracking one project and grow into a complete diamond painting organization system. The $7 version can cover project details, start and finish dates, canvas information, drill notes, and progress. The $17 to $27 version can add inventory, multiple project pages, storage labels, supply lists, and completion trackers.
The $37 to $47 version can become a complete Diamond Painting Project Management Bundle with dashboards, work-in-progress tracking, drill and color organization, finishing plans, and collection management. The $67 to $77 version can add editable Canva files, fillable digital versions, customization options, promotional assets, and a setup guide. The price increases because the usefulness increases, not because somebody discovered the copy-and-paste button.
Now let’s look at why this hobby creates enough different organization problems to support a practical product ladder.
Why Diamond Painting Project Planners Work As A Product Ladder
Diamond painting naturally creates several planning needs. A crafter may want to remember the name of a kit, record the canvas size, track when the project was started, keep notes about drills, record missing supplies, monitor progress, and remember what still needs to be completed. Someone working on several projects at once has an even bigger need for organization.
That gives you multiple ways to add value without changing the basic idea. A beginner may only need one clean project sheet. A collector may want a project dashboard. A frequent crafter may want inventory tracking and storage labels. Someone who creates finished pieces as gifts or sells completed artwork may also want finishing, photography, and project scheduling pages.
The important part is to build around real tasks. You are not selling “more pages.” You’re selling a calmer way to keep track of the craft. Nobody wakes up thinking, “Today I desperately need 42 more planner pages.” They think, “Where is that project I was working on?” Solve that problem and you’ve got something useful.
With that buyer problem in mind, the next question is how much each level should actually contain.
The Reasonable Pricing Rule
The basic rule is simple: the higher the price, the more useful the product should become. A $7 product should deliver a quick win. A $17 to $27 product should provide a more complete system. A $37 to $47 product should help the buyer manage more of the work. A $67 to $77 product should save significant setup time through editable assets, digital versions, customization, or business-use support when appropriate.
For Diamond Painting Project Planners, the pricing ladder can work like this:
- $7 is for a quick win. Give the buyer a clean project planner that helps organize one diamond painting project.
- $17 to $27 is for a better kit. Add multiple project pages, inventory tools, progress trackers, storage labels, supply planning, and better instructions.
- $37 to $47 is for a working bundle. Combine project planning, collection management, inventory, work-in-progress tracking, finishing plans, and practical reference pages.
- $67 to $77 is for a premium editable system. Add editable templates, fillable files, customization instructions, specialty pages, promotional assets, and a clear setup system.
You don’t have to force every topic into $77. If your premium offer doesn’t provide enough additional value, stop at $47 or $67. But diamond painting has enough moving parts to support a premium version when the offer is designed thoughtfully.
Let’s start with the smallest useful product.
The $7 Starter Product: Diamond Painting Project Planner
The $7 starter product should solve one clear problem: helping a crafter organize an individual diamond painting project. Keep it simple enough that someone can open the file, print the pages, and start using them immediately.
A strong starter planner could include a project information page with the kit name, design or subject, canvas size, kit source, start date, target completion date, and general notes. You can also include sections for recording the type of drills used, important color or symbol information, and supply notes if the crafter’s kit provides that information.
Progress tracking can make the planner more useful without making it complicated. Include a simple progress tracker where users can mark sections completed, record milestone dates, and write notes about anything they need to remember. If the kit has missing or extra drills, a small “snag sheet” can give the user a place to record the issue rather than relying on memory, which is lovely until memory decides to go on vacation.
What To Include
- Project information page
- Canvas details
- Start and target completion dates
- Progress tracker
- Drill and color notes
- Supply checklist
- Project notes
- Completion checklist
At $7, don’t try to include a complete inventory system, editable templates, business planning tools, or every possible page a crafter could ever imagine. The buyer should receive a focused solution, not a small forest disguised as a printable.
Once that quick win is working, you can expand it into a much more useful organization kit.
The $17 To $27 Expanded Kit: Diamond Painting Organization Kit
The next level should help someone manage more than one project. Call it something like the Diamond Painting Organization Kit or Diamond Painting Project Planner Bundle. The key difference is that the buyer isn’t just planning a project anymore. They’re organizing their diamond painting hobby.
Add multiple project planning pages so the crafter can keep several works in progress organized. Include a master project tracker that records project names, status, start dates, target completion dates, and notes. A separate supply and inventory section can help users keep track of items such as trays, storage containers, spare drills, wax or other commonly used supplies, while leaving room for them to record the supplies that matter to their own setup.
This is also a good place for storage labels and organization pages. Include printable labels for project boxes or containers, color and drill tracking sheets, a missing-drill “snag sheet,” a completion checklist, and a simple project priority page. These additions make the kit feel substantially more useful because the buyer can use it repeatedly rather than printing one page and wandering off into the craft room wilderness.
Possible Expanded Kit Contents
- Everything in the $7 starter planner
- Master project dashboard
- Multiple project planner pages
- Works-in-progress tracker
- Project priority planner
- Supply and inventory tracker
- Drill and color tracking pages
- Missing-drill snag sheet
- Storage labels
- Completion checklist
- Project review page
- Simple setup instructions
A price between $17 and $27 makes sense when the customer can see that the kit helps them organize an entire hobby instead of just documenting one project. You’re giving them a repeatable system, not simply more decorative pages.
Now we can take that organization system and turn it into a complete working bundle.
The $37 To $47 Working Bundle: Diamond Painting Project Management Bundle
The $37 to $47 offer should feel like the buyer’s complete planning system. This could be called the Diamond Painting Project Management Bundle or Ultimate Diamond Painting Planner Bundle. The focus should be implementation, meaning the buyer can actually use the bundle to manage their projects from selection through completion.
Start with a master dashboard that shows the user’s current projects at a glance. Add sections for project status, priority, start date, target completion date, and final completion date. Then connect that dashboard to detailed project pages. This gives the buyer a simple way to see the big picture without losing the details of individual canvases.
You can also add collection planning, supply organization, finishing plans, and project photography notes. For someone who makes finished diamond paintings as gifts, include a gift planning page with recipient, occasion, target date, and finishing notes. For someone who sells finished pieces, you could include optional photography and listing preparation pages. Keep these clearly optional so the product works for hobbyists who simply enjoy the craft.
What Makes The Bundle Feel Complete?
- Master project dashboard
- Detailed project planner
- Works-in-progress tracker
- Project scheduling pages
- Supply inventory tracker
- Drill and color organization pages
- Storage and labeling system
- Project completion checklist
- Finishing and framing planning page
- Gift project planner
- Optional finished-art photography checklist
- Collection tracker
- QuickStart setup guide
The bundle should save the buyer time by putting related tasks in one place. That’s the real reason to move from $27 to $47. The customer isn’t paying for a fancier cover. They’re paying for a system that reduces the “What am I supposed to do next?” problem.
And if you want to build the premium level, this is where editable assets can make a meaningful difference.
The $67 To $77 Premium Kit: Ultimate Diamond Painting Studio Command Center
The premium offer can become the Ultimate Diamond Painting Studio Command Center. This should not simply be the $47 bundle with a bigger cover and a dramatic font. The buyer needs a real reason to choose the premium version.
Editable files are one strong way to create that difference. Build editable versions in Canva so buyers can personalize titles, labels, categories, colors, and layouts. You can also provide finished PDF versions for immediate printing and fillable digital versions where practical. Include a clear setup guide so the buyer knows which files to use and how the pieces fit together.
If your audience includes people who create products or content around diamond painting, you can add promotional templates such as social post layouts, simple product announcement graphics, mockup ideas, and promotional copy prompts. If you offer commercial use, customization, or resale rights, provide clear written license terms. Don’t toss “PLR” into the sales page like magical fairy dust. Rights need to be specific and understandable.
Premium Components
- Everything in the working bundle
- Editable Canva planner templates
- Editable storage labels
- Printable PDF versions
- Fillable digital versions where practical
- Customizable project dashboards
- Specialty project planning pages
- Collection management pages
- Gift and finished-art planning pages
- Social media promotional templates
- Simple promotional copy prompts
- Mockup ideas
- Customization guide
- Setup checklist
- Clear license terms for any commercial-use rights offered
The $77 price is not justified because the product is longer. It’s justified when the buyer receives a flexible system that saves setup time and can be adapted to their own workflow. That’s always a Good Thing because nobody buys a planner dreaming of spending Saturday night rebuilding the planner.
Let’s put the whole ladder side by side so the value difference becomes obvious.
Example $7 To $77 Diamond Painting Product Ladder
| Price | Product | What It Includes | Primary Value |
|---|---|---|---|
| $7 | Diamond Painting Project Planner | Project details, canvas information, dates, progress tracker, drill notes, supplies, completion checklist | Quick organization for one project |
| $17-$27 | Diamond Painting Organization Kit | Multiple project pages, dashboard, WIP tracker, inventory, drill tracker, storage labels, priority planner | Organizes the hobby |
| $37-$47 | Diamond Painting Project Management Bundle | Complete planning system, collection tracker, scheduling, inventory, finishing, gift and photography planning | Manages projects from start to finish |
| $67-$77 | Ultimate Diamond Painting Studio Command Center | Editable Canva files, PDFs, digital versions, customization guide, specialty templates, promotional assets and clear license terms where applicable | Saves setup time and provides a flexible premium system |
Notice what happens as the price increases. The $7 product solves one small problem. The $17 to $27 product organizes several related tasks. The $37 to $47 bundle creates a complete working system. The $67 to $77 version adds flexibility, editing, customization, and time-saving assets.
That’s a healthy product ladder because the customer can see what they’re getting at every level. Nobody has to squint at the sales page and wonder whether the $77 version is just the $7 version wearing a fancy hat.
Next, let’s look at the tools that can help you build the ladder efficiently.
Tools You Can Use To Create This Ladder
You don’t need an enormous technology stack to create Diamond Painting Project Planners. A few simple tools can handle the design, organization, writing, and delivery.
- Canva: Use it to design printable planner pages, dashboards, storage labels, covers, social graphics, and editable premium templates.
- Google Docs: Useful for writing instructions, setup guides, checklists, and editable text-based resources.
- Google Sheets: Helpful for creating digital project dashboards and inventory trackers.
- ChatGPT: Use it to brainstorm planner sections, organize product ideas, develop checklists, and create draft promotional copy.
- Etsy: Useful for researching how similar digital craft products are presented and for selling your own products if the marketplace fits your business.
- Creative Fabrica: Useful for researching design resources and creating supporting graphics, while making sure you follow the license attached to every asset you use.
- Payhip: A simple option for delivering digital products directly to customers.
- Gumroad: Another option for selling and delivering downloadable products.
You can build the first version with Canva and a simple PDF. That’s enough to get started. As the offer grows, you can add Google Sheets, editable Canva files, and a stronger delivery system.
The goal is to use technology to reduce your workload, not create a twelve-tab spreadsheet explaining your twelve-tab spreadsheet. That way lies madness.
Before you publish the product, give the price a practical reality check.
How To Know If Your Price Is Fair
Don’t decide the price based only on how long it took you to make the planner. A product that took three hours to design isn’t automatically worth $30, and a product that took thirty minutes isn’t automatically worth $5. Buyers care about usefulness, clarity, convenience, and the problem the product helps solve.
Ask yourself whether the product saves time, reduces confusion, helps the customer finish a task, or makes an ongoing hobby easier to manage. Then compare each version against the previous one. If the $27 version doesn’t feel meaningfully more useful than the $7 version, you haven’t built a ladder yet. You’ve built four price tags for the same sandwich.
Use This Price Check
- Does the product solve a clear organization problem?
- Does it save the buyer time?
- Can the buyer use it repeatedly?
- Does it help the buyer finish or manage projects?
- Does each higher level add useful functionality?
- Are examples or instructions included where needed?
- Does the premium version provide genuinely editable or customizable assets?
- Are any commercial or resale rights clearly explained?
- Would you personally feel comfortable buying the product at that price?
A higher price becomes easier to understand when the buyer can see the time saved and the extra work already done for them. That’s especially true with editable templates because the customer can adapt the system instead of rebuilding it from scratch.
Now let’s turn the idea into five practical steps you can actually follow.
5-Step Action Plan For Diamond Painting Project Planners
Step 1: Pick One Buyer Problem
Start with one problem instead of trying to solve the entire diamond painting universe. “I need a simple way to track my current project” is a strong starting point. Build the first product around that problem and keep the pages focused.
Step 2: Create The $7 Quick Win
Create the smallest useful planner that solves the problem. Include project information, dates, progress tracking, drill or color notes, supply notes, and completion tracking. Make it attractive and easy to print, but don’t bury the useful parts under decoration.
Step 3: Expand It Into A Kit
Take the starter product and identify the next problems the same customer is likely to have. Add multiple project pages, a master dashboard, inventory tracking, storage labels, priority planning, and a missing-drill snag sheet. Include simple instructions so buyers know how to use the system.
Step 4: Build The Premium Version
Add editable Canva files, fillable digital versions where appropriate, specialty pages, customization instructions, and promotional assets. If you offer commercial use or resale rights, create clear license terms before selling the premium package.
Step 5: Test The Ladder
Review every level and ask whether the next price actually delivers more value. If two versions feel almost identical, combine them or improve the higher one. You can also ask early customers which pages they use most and use that feedback to strengthen the next version.
Once the ladder is built, a few common mistakes can still trip you up. Let’s avoid those before they start multiplying like loose drills.
3 Ways To Stand Out From The Thundering Herd
1. Design For Real Crafting Habits
Don’t create a generic planner and slap a diamond-shaped icon on the cover. Think about what diamond painters actually need to remember. Include project status, kit details, progress, supplies, storage, missing drills, and completion information. Specificity makes the product feel like it was designed by someone who understands the hobby.
2. Give Buyers Flexible Choices
Some people love printing pages. Others want digital files. Some want a simple black-and-white version, while others enjoy a decorative layout. You don’t have to create twenty-seven editions on day one, but offering a few useful formats can make the higher-level products more appealing.
3. Build A System Instead Of A Stack
Make the pages work together. A master project dashboard should connect naturally to the individual project pages. Inventory should connect to supply planning. Completion pages should connect to finishing notes. When the pieces feel like one system, the product becomes more valuable than a random collection of worksheets.
Once the product is useful, the next challenge is putting it in front of people who actually enjoy diamond painting.
3 Nifty Ways To Find Customers
1. Use Pinterest For Problem-Based Searches
Create Pinterest content around problems such as “diamond painting organization,” “diamond painting project tracker,” “how to organize diamond painting supplies,” and “diamond painting planner printable.” Each pin can lead to a product page or helpful blog post that introduces the planner naturally.
2. Participate In Relevant Craft Communities
Look for diamond painting communities where people discuss organization, unfinished projects, storage, craft rooms, and planning. Follow the group’s rules and contribute useful information instead of dropping sales links like confetti. Helpful content builds more trust than constant promotion.
3. Create Content Around The Messy Middle
Show the problems that happen between buying a kit and finishing it. Talk about unfinished projects, forgotten supplies, project rotation, storage, and tracking progress. Those are the moments when a planner feels useful. Your content can demonstrate the problem first and then show how your product helps organize it.
Now let’s pull out a few product-building ideas that can give your offer a little more personality.
3 Takeaways You Won’t Find Everywhere
1. Make The “Snag Sheet” A Feature
A missing-drill or problem tracker can be a surprisingly useful page. Give the buyer a place to record the project, symbol or color information supplied with their kit, the issue, and what action they need to take. Small practical features like this can make a planner feel much more thoughtful.
2. Add A Project Rotation Planner
Many hobbyists enjoy having more than one project available. A project rotation page can help them decide which project is active, which is waiting, and which is next. That turns your planner from a record-keeping product into something that helps them make decisions.
3. Treat Finished Projects As Part Of The Journey
Don’t stop the planner at “Done.” Add a completion record where users can note the finishing date, display location, gift recipient, framing plans, or photography notes. A completed project can become part of a personal collection record, which gives the planner a longer useful life.
Those little details are helpful, but you also need to know what can make a good ladder go sideways.
Common Pricing Mistakes To Avoid
- Charging $77 for a thin PDF: A small printable does not become premium because the price changed. Add meaningful functionality before increasing the price.
- Adding pages instead of usefulness: Twenty extra pages of blank boxes won’t impress buyers if they don’t solve another problem.
- Making every version too similar: Each level needs a clear reason to exist.
- Forgetting editable files: If the premium offer promises customization, make sure editable files are actually included.
- Offering unclear rights: If you include commercial use, customization, or resale rights, explain exactly what buyers may and may not do.
- Using fake income claims: Don’t tell customers that a planner will automatically make them money. It won’t. A useful product is enough.
- Making the ladder confusing: Keep the differences between $7, $27, $47, and $77 easy to understand.
The easiest fix is to think like the buyer. If you landed on the sales page today, could you immediately tell which version you need and why? If not, simplify the offer.
With the pricing mistakes out of the way, you can start promoting the planner without making it sound like a late-night infomercial.
Simple Promo Angles For Diamond Painting Project Planners
- “Keep every diamond painting project in one place.”
- “Stop wondering which project you were supposed to finish next.”
- “Track your canvas, supplies, progress, and completion in one simple planner.”
- “Organize your works in progress before they take over the craft room.”
- “Turn your diamond painting pile into an organized project list.”
- “Plan your next canvas without losing track of the one you’re already working on.”
- “Use editable templates to create a planning system that fits your craft routine.”
For social content, demonstrate one useful page at a time. A short video showing a messy project pile becoming an organized dashboard can be more convincing than a paragraph full of superlatives. Show the problem. Show the planner. Show how it works.
You can also create a simple free sample page, such as a project tracker or completion sheet, and use it to introduce your larger paid kit. That gives potential buyers a chance to see the quality before deciding whether they want the full system.
There are also natural affiliate opportunities around this niche when handled honestly.
Affiliate Opportunities Around Diamond Painting Organization
A Diamond Painting Project Planner can naturally lead into content about supplies and organization. You could create helpful resource content around storage containers, drill organizers, trays, light pads, craft storage furniture, magnifiers, project bags, labeling supplies, and other accessories commonly used by crafters.
The important part is to recommend products because they solve a real organization problem, not because you’re trying to attach an affiliate link to every object within arm’s reach. Create useful content such as “How To Organize Multiple Diamond Painting Projects” and place relevant affiliate recommendations where they genuinely help.
You can also create comparison-style content around different organization approaches. For example, one article might cover portable storage, another might cover craft-room organization, and another might explain how to organize supplies for multiple works in progress. Your planner can become the natural planning component within that content.
Next, let’s turn your content strategy into a simple internal linking plan.
Internal Link Ideas
If you’re building a larger content site around printable products, connect your Diamond Painting Project Planner article to related topics that answer the next question your reader is likely to ask.
- How To Organize Diamond Painting Supplies
- Diamond Painting Storage Ideas For Small Craft Spaces
- How To Track Multiple Diamond Painting Projects
- Diamond Painting Inventory Trackers
- Craft Room Organization Printables
- How To Create Printable Craft Planners
- How To Sell Hobby Printables Online
- How To Create Editable Canva Printables
Use descriptive anchor text instead of generic phrases like “click here.” A link that says “diamond painting storage ideas” tells the reader exactly what they will find and gives the search engines useful context too.
Pinterest can give this topic even more mileage, especially because planning and organization products are naturally visual.
Pinterest Ideas For Diamond Painting Project Planners
Create pins that show the actual pages and the problems they solve. Use clean mockups with readable text and strong titles rather than trying to squeeze the entire product description onto one image. Your goal is to make someone stop scrolling and think, “Oh, I need that.”
- “Diamond Painting Project Planner Printable”
- “How To Organize Multiple Diamond Painting Projects”
- “Diamond Painting WIP Tracker”
- “Diamond Painting Supply Inventory Printable”
- “Diamond Painting Storage Labels Printable”
- “Diamond Painting Craft Room Organization”
- “Diamond Painting Project Checklist”
- “Printable Planner For Diamond Painting Lovers”
Create several designs from the same product. One pin can focus on project tracking. Another can highlight storage. Another can show the master dashboard. Another can demonstrate the premium editable version. One product can create a whole little content family instead of requiring you to invent a brand-new product every Tuesday.
Let’s answer some of the questions buyers are likely to have before purchasing.
Frequently Asked Questions
What should a basic Diamond Painting Project Planner include?
A basic planner can include project details, canvas information, start and target completion dates, progress tracking, supply notes, drill or color notes, and a completion checklist. Keep the first version focused on helping someone manage one project.
Can I make the planner digital as well as printable?
Yes. You can create printable PDFs and, where practical, fillable digital versions. You can also offer editable templates at the premium level so customers can customize the planner for their own workflow.
Should I include drill color codes?
You can include a place for buyers to record color or drill information supplied with their own kits. Because kit formats and labeling systems can vary, it is safer to make the planner flexible rather than assuming every diamond painting kit uses the exact same system.
What can I add to make a $27 version different from a $7 version?
Add meaningful organization tools such as a master project dashboard, multiple project pages, inventory tracking, storage labels, project priority planning, and a missing-drill snag sheet. The buyer should feel that the larger kit helps manage the hobby, not merely one project.
What makes a $47 version different?
The $47 version can function as a complete project management system. Add collection tracking, scheduling, finishing plans, gift planning, optional photography pages, and a QuickStart guide that shows buyers how to use the whole system.
What makes the $77 version worth more?
The premium version can include editable Canva templates, fillable digital files, specialty layouts, customization instructions, promotional assets, and clearly defined commercial-use or resale rights when appropriate. The premium value should come from flexibility and time savings.
Do I need to create every version before selling the $7 product?
No. Start with the $7 product. You can use customer questions, feedback, and buying behavior to decide which additions belong in the next level. That’s often smarter than spending weeks building a giant premium bundle that nobody has asked for yet.
With the questions answered, you’re ready to turn the idea into a simple production plan.
Your Next Steps
Start by creating the $7 Diamond Painting Project Planner. Keep it focused, attractive, and genuinely useful. Test it yourself and make sure every page has a reason to exist.
Then build the $17 to $27 kit by looking at the problems that remain after someone uses the starter planner. Add inventory, multiple project tracking, storage labels, and organization tools. Once that version feels useful, expand it into the $37 to $47 working bundle.
Only after you have a strong core system should you build the premium version. Add editable files, digital options, customization, specialty pages, and promotional assets. That gives you a ladder that grows naturally instead of a giant product that took forever to create before you knew whether anyone wanted it.
Your next move is simple: open Canva and create the first project page. One useful page can become the beginning of an entire product line.
And yes, that is much less intimidating than trying to create the Ultimate Diamond Painting Mega-Whopper on day one.
Let’s wrap the whole strategy into one clean picture.
Final Ladder Summary
| Level | Suggested Price | Core Offer | Value Added |
|---|---|---|---|
| Starter | $7 | Diamond Painting Project Planner | Quick project organization |
| Expanded Kit | $17-$27 | Diamond Painting Organization Kit | Multiple projects, inventory, storage, progress and planning |
| Working Bundle | $37-$47 | Diamond Painting Project Management Bundle | Complete project and collection management system |
| Premium | $67-$77 | Ultimate Diamond Painting Studio Command Center | Editable assets, digital versions, customization and implementation support |
The $7 version gives the customer a quick win. The $17 to $27 version gives them more help. The $37 to $47 version gives them a working system. The $67 to $77 version gives them flexibility, editable assets, and time-saving support.
Each step should feel like a natural next purchase. Someone shouldn’t buy the $27 kit and wonder why they paid extra for pages they already received at $7. They should see exactly what the bigger product helps them do.
That’s the heart of a good product ladder: every step earns its place.
And now for the part where you actually make the thing.
Conclusion
Diamond Painting Project Planners have a simple advantage: they solve an organization problem inside a hobby where people can easily end up with multiple projects, supplies, notes, and unfinished canvases competing for attention. That makes the topic flexible enough for several useful digital products.
You don’t need to build the entire ladder at once. Start with one $7 planner. Make it useful. Listen to what buyers need next. Then expand it into a larger organization kit, a complete project management bundle, and eventually a premium editable system.
The goal isn’t to create the biggest diamond painting planner on the internet. The goal is to create the planner that makes the buyer say, “Finally. Now I know what I’m doing.”
So start small. Create the first project page. Give it a clear purpose. Then let that one useful product grow into the ladder.
Enjoy!