Introduction
Jewelry makers rarely run out of ideas, but they can run out of places to put those ideas. One sketch leads to another, a new bead color sparks a different design, and suddenly there are notes on scraps of paper, photos on a phone, supplies in little boxes, and three unfinished necklaces sitting on the craft table. That’s Not a Good Thing when a brilliant design idea disappears because nobody can remember which clasp, bead combination, or measurement made it work.
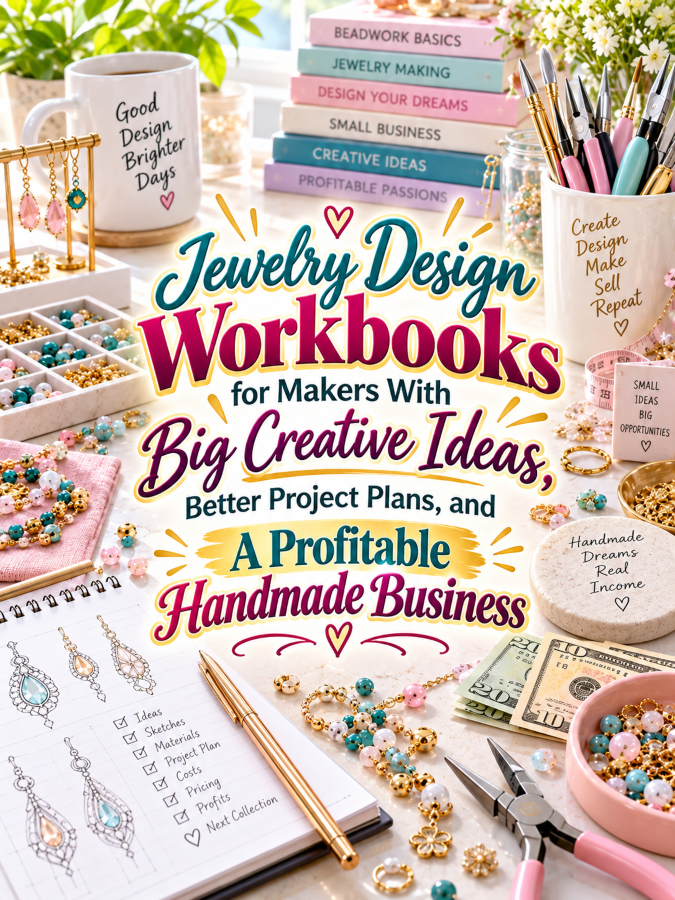
That’s where a Jewelry Design Workbook can become a surprisingly useful printable product. It gives makers one organized place to capture inspiration, sketch designs, record materials, test combinations, calculate costs, track revisions, and document finished pieces. Instead of simply selling blank pages, you’re creating a creative command center that helps jewelry makers move from “I have an idea!” to “Look what I made!”
The opportunity gets even more interesting when you think beyond hobby use. Jewelry makers who sell earrings, bracelets, necklaces, rings, wire-wrapped pieces, or custom designs have additional needs around pricing, inventory, collections, customer requests, and product launches. That means one simple workbook can become the starting point for an entire product ladder, and yes, the thundering herd of craft printables just got a little more crowded.
Quick Answer
A Jewelry Design Workbook is a printable planning and documentation system that helps makers capture design ideas, sketch jewelry, plan materials, record measurements, track experiments, calculate costs, and document finished pieces. The best version should help users move through the entire creative process instead of giving them a random collection of pretty worksheets. Think of it as a creative notebook with a job to do.
You can begin with a $7 Jewelry Design Idea Workbook and then expand it into a $17 Design Planning System, $27 Jewelry Maker Workbook, $47 Complete Jewelry Design Binder, and $77 Comprehensive Jewelry Business Library. Additional products can focus on bead inventory, collection planning, custom orders, pricing, craft fairs, product photography, and jewelry business management. That’s a Good Thing because your first workbook doesn’t have to carry the entire business on its back.
Why This Niche Works
Jewelry making is a highly creative hobby, which means makers constantly experiment with materials, colors, textures, shapes, techniques, and combinations. A maker might sketch a bracelet today, discover a better clasp tomorrow, change the bead colors next week, and then forget what version actually worked. A workbook can turn all those experiments into organized creative information that can be reused later.
There are also many different types of jewelry makers you can serve. Bead artists, wire workers, polymer clay jewelry makers, metal jewelry designers, resin artists, charm makers, bridal jewelry creators, and handmade sellers all have slightly different planning needs. That gives you plenty of room to create niche-specific versions without abandoning the main concept.
The business angle makes this niche even stronger. A hobby maker may only need design sketches and material notes, while a seller needs costs, pricing, inventory, product codes, collection planning, customer information, and sales tracking. By creating products for different stages of the maker’s journey, you can build a product ladder around the same core audience.
What You Can Put Inside A Jewelry Design Workbook
1. Jewelry Idea Capture Pages
Start with pages that make it easy to capture an idea before it disappears. Include fields for the design name, jewelry type, inspiration source, intended wearer, color palette, materials, and special features. Add a large open area where the maker can sketch or paste a reference image.
You can also include prompts such as “What inspired this design?”, “What problem am I trying to solve?”, and “What makes this piece different?” These questions encourage makers to think about the design instead of simply recording a shopping list. A simple idea page can therefore become the starting point for a much bigger creative process.
2. Jewelry Sketch Sheets
Sketch pages give makers a dedicated space to turn ideas into visual concepts. Create separate templates for necklaces, bracelets, earrings, rings, pendants, and other common jewelry forms. Include light guides or proportions where helpful, while leaving enough open space for creative freedom.
Don’t worry about making every sketch template artistically complicated. The goal is to help makers communicate their ideas clearly enough to remember what they intended to create. Sometimes a few lines and circles are all a maker needs before the beads start doing their thing.
3. Materials Planning Sheets
Every jewelry project depends on materials, so give makers a structured way to record what each design requires. Include fields for beads, findings, wire, chain, clasps, charms, gemstones, adhesives, packaging, and other supplies. Add quantity and source fields so makers know what they need before starting.
You can also include a “Have,” “Need,” and “Order” column to prevent unnecessary purchases. This is especially useful for makers with large supply collections. Nobody needs another tiny bag of gold jump rings hiding behind twelve other bags of gold jump rings unless they actually need it.
4. Color and Component Experiment Logs
Jewelry design often involves experimentation, and experiments can teach makers what works and what doesn’t. Create pages where users can record bead combinations, color palettes, component sizes, wire gauges, finishes, and other variables. Give each experiment a simple result field such as Works, Needs Changes, or Try Again.
Include space for notes about what the maker would change in the next version. Over time, these pages become a personal design reference library. That turns failed experiments into useful information instead of letting them disappear into the craft-room Bermuda Triangle.
5. Project Planning Pages
Once an idea becomes a real project, makers need more structure. Create project pages for the design name, project goal, materials, measurements, techniques, estimated time, difficulty, and target completion date. Include a step-by-step checklist so makers can track construction from beginning to finishing touches.
You can add a project status section with stages such as Idea, Sketch, Materials Ready, In Progress, Testing, Finished, and Ready to Sell. This gives makers a simple visual workflow. It also makes the workbook useful for people managing several jewelry projects at once.
6. Jewelry Cost and Pricing Worksheets
Cost tracking is essential for anyone who plans to sell handmade jewelry. Include fields for materials, packaging, labor time, marketplace fees, shipping supplies, and other project expenses. A pricing worksheet can then help makers see the estimated cost of producing each piece before deciding on a selling price.
Keep the calculations understandable rather than turning the page into an accounting exam. Makers should be able to see what a piece costs and what they need to charge to support their business. That’s a Good Thing because “I think this bracelet feels like a $12 bracelet” isn’t exactly a pricing strategy.
7. Collection Planning Pages
Jewelry makers who sell products often think in collections rather than individual pieces. Create pages where they can plan a collection around a theme, season, color palette, material, occasion, or customer type. Include spaces for collection names, product ideas, coordinating pieces, launch dates, and missing designs.
You can also add a collection checklist that tracks whether each planned piece has been designed, made, photographed, listed, promoted, and packaged. This turns the workbook into a bridge between creativity and business planning. A maker can see the collection as a whole instead of treating every piece like a completely separate project.
8. Finished Jewelry Design Library
Give makers a place to document finished pieces so successful designs aren’t forgotten. Include the final design name, materials, measurements, construction notes, cost, selling price, completion date, and customer or recipient information when appropriate. Add a photo area so the page becomes a visual record of completed work.
You can also include fields for “Would I Make This Again?”, “What Worked?”, “What Would I Change?”, and “Customer Feedback.” These details become extremely valuable when a maker wants to recreate a popular design. Your workbook then becomes a personal design archive that grows more useful with every finished project.
Tools You’ll Need
Canva can help you design attractive workbook pages with consistent layouts, typography, icons, tables, sketch areas, and printable sections. You can create a reusable master style and then adapt it for earrings, bracelets, necklaces, beadwork, wire jewelry, or other niches. That’s a Good Thing because you want your design system doing some of the heavy lifting.
Google Docs can help you organize workbook content, write instructions, draft prompts, and plan the page sequence before designing the final printable. It is especially useful when you’re testing different sections and deciding what belongs in the starter version. Get the structure right first, then make it beautiful.
AWeber can help you build an email audience around jewelry design, crafting, handmade business tips, and creative planning. Offer a free jewelry idea sheet or design sketch page to attract makers who want help organizing their ideas. Once they’re on your list, you can share useful content before presenting your paid workbook.
GetResponse can support email campaigns and automated sequences for your jewelry printable business. You could create a short series covering idea capture, material planning, project tracking, pricing, and collection development. Each useful lesson creates a natural opportunity to introduce a related printable product.
Gumroad can give you a simple storefront for selling downloadable jewelry workbooks, design sheets, and business planning products. Start small with one focused workbook and add bundles as your catalog grows. This allows you to test which jewelry organization problems customers are most interested in solving.
Teachable can become useful if you eventually want to teach jewelry design or handmade-business organization alongside your printables. You could create a course about turning jewelry ideas into finished collections and include workbook pages as downloadable resources. That gives you another product format built around the same audience.
Amazon jewelry design workbook research can help you study physical jewelry design notebooks, craft planners, sketchbooks, bead organizers, and related products. Pay attention to recurring features, customer questions, and problems mentioned in reviews. Those observations can help you identify useful printable pages that makers are already looking for.
Your 5-Step Action Plan
Step 1: Choose Your Jewelry Maker
Start by choosing a specific type of jewelry maker instead of trying to serve everybody who owns a bead. A beginner bead artist, an experienced wire wrapper, and a handmade jewelry seller may all want a workbook, but their needs won’t be identical. Pick one audience for your first product so your pages feel intentional and specific.
You could target bead jewelry makers, polymer clay jewelry artists, wire jewelry makers, gemstone designers, bridal jewelry creators, or handmade jewelry sellers. Once you choose your audience, make a list of the five biggest organizational problems they experience. Those problems should guide the pages you create.
Step 2: Build The Idea-to-Finished-Piece Workflow
Your workbook should follow the way a jewelry idea actually develops. Start with inspiration, move into sketching, then materials planning, construction, testing, finishing, pricing, and documentation. When the pages follow that natural journey, the workbook becomes much easier to understand and use.
Don’t create pages simply because you can. Every page should answer a useful question such as “What am I making?”, “What do I need?”, “What changed?”, “What did I learn?”, or “What happens next?” If a page doesn’t help answer a meaningful question, it may belong in the scrap pile instead of the final product.
Step 3: Include Both Creative and Business Pages
Creative pages attract makers because they help them capture ideas and design pieces. Business pages create additional value for makers who sell their work, especially when they include costing, pricing, collection planning, inventory, and customer information. Combining both sides allows your workbook to grow with the user.
You don’t have to put every business feature into the starter version. Keep the basic product focused and use advanced business pages for higher-priced versions or companion products. That gives customers a reason to move up the product ladder as their needs become more sophisticated.
Step 4: Turn One Workbook Into A Product Ladder
Your $7 starter product could contain jewelry idea sheets, sketch pages, materials planners, and basic project records. Your $17 expanded version could add experiment logs, finished-piece records, collection planning, and supply tracking, while the $27 workbook could include detailed pricing and business planning pages. A $47 binder system could combine creative and business organization, while a $77 comprehensive library could include specialized versions for different jewelry-making styles.
You can also create companion products such as Jewelry Collection Planners, Bead Inventory Trackers, Custom Order Workbooks, Jewelry Pricing Calculators, Craft Fair Planning Kits, and Product Launch Planners. Each one can address a different stage of the maker’s journey. That’s how you build a product ecosystem instead of hoping one printable does everything forever.
Step 5: Market The Transformation
Don’t lead with the number of pages in your workbook because page count doesn’t explain why someone should care. Instead, show how the workbook helps makers turn scattered ideas into organized designs, planned projects, finished pieces, and profitable collections. You’re selling creative clarity and better organization, not paper.
Use content that demonstrates the transformation. Show a messy design idea becoming a sketch, then a materials list, then a finished jewelry piece with documented costs and pricing. When potential customers can see the journey, they can immediately understand what the workbook is designed to help them accomplish.
What Comes Next
Once you’ve built the basic Jewelry Design Workbook, you can expand into specialized products for different jewelry-making styles. Beadwork, wire wrapping, polymer clay jewelry, resin jewelry, gemstone design, bridal jewelry, and handmade jewelry businesses can each have their own planning needs. Each niche gives you another opportunity to create a focused product without starting completely from zero.
The next step is also to think about how your customer uses the workbook after the first project. If your pages help makers record successful designs, track costs, organize collections, and document customer feedback, the workbook becomes more valuable over time. That’s a Good Thing because a product that grows with the user has a much stronger reason to stay on the craft table.
In Part 2, we’ll explore how to make your Jewelry Design Workbook stand out from the thundering herd, find customers who genuinely need it, avoid common mistakes, and scale one creative workbook into a complete product line. We’ll also look at ways to turn jewelry makers’ biggest organizational headaches into new printable offers. That’s it. That’s your beginning!
Enjoy!