
Introduction
Embroidery has a funny way of turning a few threads and a piece of fabric into something that feels incredibly personal. A stitcher may remember the finished design perfectly, but six months later they might have forgotten the thread colors, fabric type, hoop size, stitch combinations, pattern adjustments, or the tiny thingee that made the whole project work. That’s Not a Good Thing when you want to recreate a favorite design, improve your technique, or simply remember the story behind something you spent hours making.
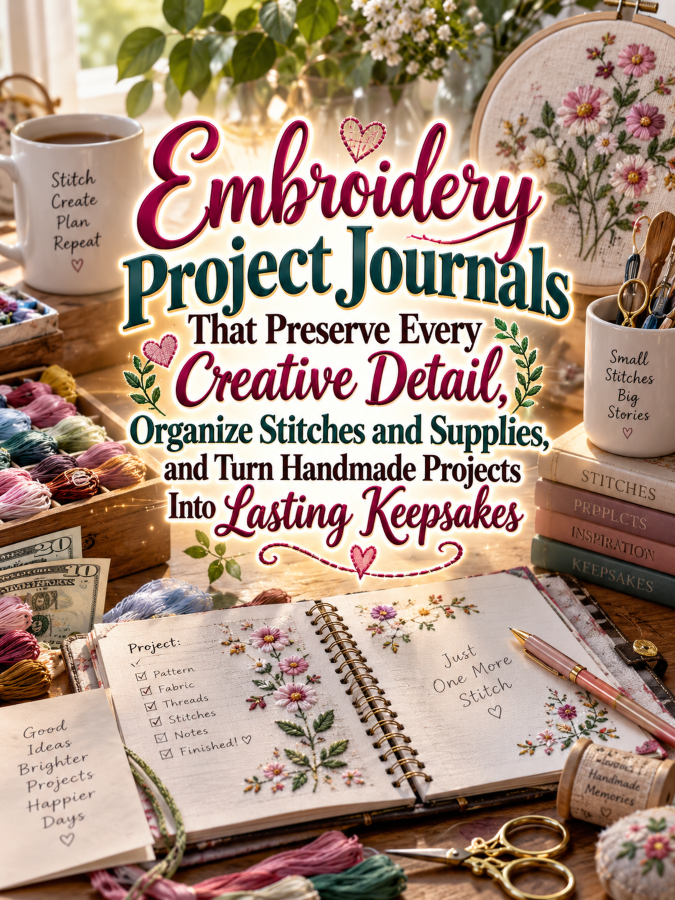
That’s where embroidery project journals can become a wonderful digital product opportunity. An embroidery journal can give stitchers a dedicated place to record project ideas, patterns, materials, colors, stitches, progress, finishing details, and photographs of completed work. It can also become a creative keepsake that documents not just what someone stitched, but what they learned, loved, changed, and discovered along the way.
From a digital-product perspective, this niche gives you plenty of room to build a product ladder. You could start with a $7 Embroidery Project Journal, expand into a $17 Stitching Workbook, create a $27 collection of specialized embroidery trackers, build a $47 Complete Embroidery Project Binder, and eventually offer a $77 Embroidery Journal Library packed with project pages, thread records, pattern logs, stitch references, progress trackers, and creative reflection sheets. Actual results will vary based on traffic, pricing, product quality, audience fit, and marketing, but the niche gives you a strong foundation for creating related products over time.
Quick Answer
Embroidery project journals are printable or digital resources that help stitchers document the details of their embroidery projects from the first idea through the finished piece. Useful pages can include project information, fabric and thread records, stitch notes, pattern references, progress tracking, supply lists, photographs, finishing details, and lessons learned. The journal can become both an organizational tool and a personal record of the maker’s creative journey.
A simple product ladder could begin with a $7 starter journal containing essential project pages, move to a $17 expanded workbook with thread and stitch tracking, grow into a $27 themed bundle, then become a $47 complete embroidery project binder. A $77 library could combine multiple journal styles, specialized trackers, pattern-planning pages, thread inventory sheets, project queues, and keepsake pages for completed work. You’re not promising that the journal will make someone a better embroiderer or guarantee creative success; you’re giving stitchers a practical system for remembering and organizing the details of work they already enjoy creating.
Why This Niche Works
Embroidery projects can contain surprisingly many details. A stitcher might use several thread colors, different stitch types, a particular fabric, specialty needles, beads, hoops, transfers, patterns, or personal design changes, and remembering every little detail later isn’t always easy. An embroidery journal creates one reliable place to capture that information while the project is still fresh.
The keepsake aspect makes this niche even more interesting. Embroidery is often connected to gifts, family memories, holidays, celebrations, personal milestones, home décor, or meaningful designs, so a finished-project page can capture the story behind the stitching as well as the technical details. That transforms your product from a simple tracker into something a customer may want to keep for years.
There is also a natural repeat-use opportunity. Once a stitcher fills out one project page and enjoys having all those details in one place, they may want additional pages for their next project, a thread inventory, a project queue, or a larger binder system. That’s always a Good Thing because you want your product to solve an ongoing organizational need rather than being useful for exactly one Tuesday afternoon.
Embroidery also has many sub-niches you can explore later. You could create journals for beginners, cross-stitchers, hand embroidery artists, modern embroidery makers, floral embroiderers, embroidery gift makers, textile artists, or stitchers who sell finished pieces. You don’t have to serve every group with your first product, because starting with one clearly defined audience will make your first journal much easier to design and market.
What You Can Put Inside an Embroidery Project Journal
Begin with a project overview page that gives the stitcher a complete snapshot of the project. Include spaces for the project name, inspiration, pattern source, fabric, hoop size, thread brand or type, color numbers, stitch types, start date, target completion date, and notes. You can also add an inspiration box where the user can write down the story, occasion, or idea behind the design.
Thread tracking can become one of the journal’s most valuable features. Give users room to record thread colors, codes, brands, quantities, and the projects where those threads were used. This makes it easier to remember successful color combinations and can help stitchers recreate a project later without having to stare at a finished piece and think, “Now which shade of green was that?”
Stitch documentation is another useful addition. Create pages where stitchers can record which stitches they used, where they used them, and any changes they made to the original pattern. You could also add a “Techniques to Try” list and a “Stitches I Want to Practice” section, giving the journal a forward-looking component instead of making it entirely about recording what has already happened.
Progress tracking can be simple and visual. Add milestone boxes for design transferred, first section completed, halfway point, details added, finishing started, and project completed. You can also include a finished-project page with space for a photograph, completion date, final dimensions, materials used, favorite detail, and notes for making the project again.
Tools You’ll Need
You can create this product without complicated software. Canva can help you design project pages, thread charts, trackers, covers, checklists, and promotional graphics, while Google Docs can help you draft your prompts, organize your sections, and keep track of the content before you move everything into the final layout.
For email marketing, AWeber and GetResponse can help you build an audience around embroidery organization, creative journaling, stitching tips, and project inspiration. You can sell your finished digital products through Gumroad, while Teachable can become useful later if you decide to offer embroidery classes, guided projects, or educational content alongside your journals.
For market research, Amazon Embroidery Project Journal Research can help you study related products, customer language, themes, and organizational features people are already searching for. Use this research to discover opportunities rather than copying another creator’s structure or content. You’re looking for patterns in customer needs, not somebody else’s exact recipe for making thingees.
Your 5-Step Action Plan
Step 1: Choose Your Embroidery Audience
Start by deciding who your journal is designed to help. A beginner stitcher may need simple project records, supply checklists, stitch notes, and progress tracking, while an experienced embroiderer may want detailed thread records, pattern modifications, project archives, and technique logs. Someone who sells embroidered pieces may also want cost tracking, production notes, inventory records, and customer-order pages.
You can eventually create different versions for these groups, but your first product should have a clear personality. A beginner-friendly journal might use simpler language and more guided prompts, while an advanced project journal could provide more room for detailed technical notes. The more clearly you know your customer, the easier it becomes to decide which thingees deserve a page and which ones can wait for a future product.
Step 2: Create the Core Project Record
Design one excellent project record before you build the entire journal. The page should help the stitcher capture the essential information they would want to remember later, including the pattern, fabric, thread, stitches, dimensions, dates, and notes. Give enough writing space for real information because nobody enjoys trying to squeeze an entire color palette into a box that appears to have been designed for a postage stamp.
Think about the project from beginning to end and ask what information becomes important at each stage. Before stitching, the maker needs inspiration, pattern, materials, and planning details, while during stitching they may need progress notes and changes. After completion, they may care about final measurements, photographs, finishing details, and whether they would make the design again.
Step 3: Add Thread and Stitch Tracking
Thread and stitch records can make your journal much more specialized than a generic craft planner. Give stitchers space to record thread colors, codes, brands, quantities, and notes about combinations they enjoyed. Add stitch logs where they can record the techniques used in different parts of the project and any changes they made along the way.
You can also create reusable reference pages. A “Favorite Thread Combinations” page, “Stitches to Practice” page, or “Techniques I Want to Try” page can help turn the journal into a personal creative reference system. Over time, the customer isn’t just recording projects; they’re building their own little embroidery knowledge library, and that’s a Good Thing.
Step 4: Add a Project Queue and Finished Gallery
Give stitchers a place to record future project ideas before those ideas disappear. A project queue can include the project name, priority, pattern source, materials needed, intended recipient, and status. This prevents every new embroidery idea from immediately becoming an emergency project, which is particularly helpful when the thundering herd of patterns begins marching across the desk.
Then give completed projects their own gallery. Include spaces for photographs, completion dates, final dimensions, favorite stitches, favorite details, and notes about what the stitcher would change next time. This creates a satisfying before-and-after record and gives customers a reason to keep the journal as a long-term creative keepsake.
Step 5: Turn One Journal Into a Product Ladder
Once your basic journal is finished, look for natural ways to expand it. A $7 starter journal can include essential project pages, while a $17 version can add detailed thread tracking, stitch logs, project queues, and finished-project records. A $27 bundle could contain specialized journals for floral embroidery, gifts, seasonal projects, beginner stitching, or modern embroidery.
Your $47 product could become a Complete Embroidery Project Binder containing project planning, thread inventory, stitch tracking, pattern notes, progress pages, finished galleries, and creative reflection sheets. A $77 Embroidery Journal Library could bring together multiple themed journals and reusable worksheets, giving customers a larger collection they can return to whenever another project begins calling their name.
Don’t try to build every possible product on day one. Start with one focused journal, see what customers use and ask for, and let those observations guide your next thingee. That’s it. That’s your beginning!
Once you’ve figured out all of the above, the next step is turning your embroidery journal into a product that feels personal, practical, and valuable enough to become part of a stitcher’s long-term creative routine.
3 Ways to Stand Out From The Thundering Herd!
Way 1: Turn Every Project Into a Story
One of the easiest ways to make an embroidery project journal feel special is to go beyond technical details and capture the story behind each piece. Ask questions such as why the stitcher chose the design, who the finished piece is for, what inspired the colors, or what was happening in their life when they started the project. This gives the journal emotional value because the finished embroidery becomes more than fabric and thread; it becomes a little time capsule.
You can create a dedicated “The Story Behind This Project” page with room for a short written memory and a photograph or sketch. A holiday ornament might remind someone of a family tradition, while a floral piece might have been inspired by a garden or a favorite place. Those details are exactly the sort of thing that disappear when they’re not written down, and preserving them turns your planner into a keepsake rather than just another organizational thingee.
Way 2: Make Thread Tracking a Standout Feature
Thread information can become one of the strongest reasons an embroiderer chooses your journal over a generic craft planner. Give users dedicated spaces for thread brand, color name, color number, quantity, and project usage, along with room for notes about combinations they particularly enjoyed. If they create a beautiful palette, they can record it and refer back to it when another project needs a similar look.
You can also create a “Thread Palette” page where users can write or attach small thread samples. Another page could be called “Combinations I Love,” allowing stitchers to document color pairings that worked especially well. Suddenly your journal becomes part project tracker and part personal color reference library, which is a Good Thing because nobody wants to rediscover the perfect shade combination by accident three years later.
Way 3: Create a Personal Stitch Library
Give stitchers a place to document stitches they have used, want to practice, or particularly enjoy. Each entry could include the stitch name, where it was used, what the stitcher thought of it, and notes about where they might use it again. You could also include blank practice areas so users can make their own samples and record observations.
This turns your journal into something that becomes more valuable over time. A beginner might start with a handful of simple stitches, while an experienced stitcher could build a much larger personal reference collection. You’re giving customers a reason to return to the journal even when they’re between projects, and repeat use is always a Good Thing.
3 Nifty Ways to Find Customers
Way 1: Show the Details Behind the Stitching
Embroidery marketing can be incredibly visual, so show the process rather than simply displaying the finished piece. Create posts that show a project from fabric selection through thread choices, stitching progress, finishing, and final presentation. Then demonstrate how your journal captures those decisions along the way.
For example, you could create a short content series called “What I Recorded Before I Stitched This.” Show the thread palette, fabric choice, pattern notes, stitch plan, and progress tracker, then reveal the finished embroidery. This gives your audience useful ideas while naturally demonstrating what your product actually does, which is much more convincing than repeatedly announcing that your planner is “amazing” while providing no evidence whatsoever.
Way 2: Offer a Free Embroidery Project Record
Create a free one-page embroidery project record and use it as a lead magnet. Give stitchers enough space to record the project name, pattern, fabric, thread colors, stitches, and notes so they can experience the usefulness of your organizational system. Then invite them to upgrade to the complete journal when they want more project pages, thread tracking, stitch libraries, progress records, and finished-project galleries.
This also gives you an excellent opportunity to build an email list around embroidery organization. Once someone downloads the free page, you can send helpful content about documenting projects, organizing supplies, recording favorite stitches, and preserving finished-work details. The goal is to become useful enough that the customer begins thinking of you as the person who helps keep their embroidery thingees under control.
Way 3: Create Content for Specific Embroidery Problems
Broad embroidery content can attract attention, but specific problems often attract better buyers. Create articles and social posts around questions such as how to organize embroidery projects, how to keep track of thread colors, how to document pattern changes, how to build a personal stitch reference, or how to preserve the details of finished pieces. Each topic connects naturally to a particular section of your journal.
You can also create different versions for different audiences. A beginner journal might focus on learning stitches and documenting early projects, while an advanced journal could emphasize pattern modifications, detailed thread records, and project archives. A journal for embroidery sellers could include production costs, inventory, custom-order information, and photography notes, giving you another logical branch of your product ladder.
3 Takeaways You Won’t Find Elsewhere!
Takeaway 1: Record What You Changed From the Original Pattern
Embroidery projects rarely stay exactly as they began. A stitcher may change the thread colors, alter the size, remove a section, add flowers, change the fabric, substitute a stitch, or completely decide that the original plan was merely a suggestion. Give users a place to record those changes because the finished project may look wonderful while the memory of how they achieved it slowly disappears.
A simple “Pattern Changes” section can include the original instruction, what was changed, and why the change was made. This is especially valuable when someone wants to recreate the project later. Instead of staring at their finished embroidery and thinking, “I know I changed something here,” they have an actual record, which is always a Good Thing.
Takeaway 2: Track Why Projects Are Paused
Every maker eventually has a project that stops moving. Maybe the stitcher ran out of a thread color, became unsure about a section, needed a different hoop, lost interest, or simply got distracted by a new pattern that marched into the room wearing a very convincing little hat. Your journal can make paused projects easier to understand by including a simple check-in page.
Ask “Why did I pause this?” “What do I need before I can continue?” and “Do I still want to finish it?” These questions help the stitcher decide whether the project deserves another chance or whether it should be moved into a future-ideas section. That’s Not a Good Thing for the guilt pile, but it is a Good Thing for the maker’s creative clarity.
Takeaway 3: Give Completed Projects Their Own Celebration
Finished embroidery deserves more than a tiny checkbox that says “Done.” Create a celebration page where stitchers can add a photograph, completion date, finished dimensions, materials, favorite detail, and a short reflection about the project. They can also record whether they would make the design again or what they would change next time.
Over time, those pages become a personal embroidery portfolio and creative history. A stitcher can look back and see how their interests, color choices, techniques, and project styles evolved. That emotional connection can make your journal much more memorable than a basic tracker and can encourage customers to keep purchasing additional pages or future journal editions.
3 Common Mistakes to Avoid
Mistake 1: Making the Journal Too Generic
A generic craft project planner can be used for almost anything, but that is also its weakness. Embroidery has specific details involving thread colors, fabric, hoops, stitches, patterns, transfers, finishing methods, and design changes. When your pages recognize those needs, your customer immediately understands that the product was built for their particular creative process.
You don’t have to make every single page embroidery-themed, either. Keep general planning pages where they are useful, but make the core experience clearly relevant to stitchers. The customer should open the journal and think, “Finally, someone understands why I need to record all these little details.” That’s the reaction you’re looking for.
Mistake 2: Forgetting That Stitchers Need Writing Space
Decorative embroidery motifs can make a journal beautiful, but too much decoration can leave users with nowhere to write. Make sure your project records have generous spaces for thread numbers, fabric information, pattern changes, notes, and reflections. A page that looks gorgeous but gives someone approximately the writing area of a postage stamp is Not a Good Thing.
Use decorative elements to support the layout rather than compete with it. Clear headings, logical sections, readable typography, and plenty of breathing room will make the journal easier to use. Remember that the purpose of the design is to help the stitcher document their creative work, not force them to perform embroidery inside the journal itself.
Mistake 3: Treating Every Stitcher the Same
A beginner may want guided prompts and simple explanations, while an experienced stitcher may prefer open-ended pages for detailed notes. Someone who embroiders for fun may care mostly about memories and project details, while someone selling finished pieces may need cost, inventory, and order tracking. If you design one journal around only one kind of user, you’ll miss several natural product opportunities.
The solution is to create optional sections and future versions. Keep your core journal useful for the broad audience, then develop specialized editions when you see demand. This lets you build a catalog gradually instead of creating one enormous embroidery monster that requires its own table of contents, operating manual, and possibly a small support staff.
Scaling Your Results
Once your first embroidery project journal is complete, begin creating companion products that solve related problems. You could make a dedicated thread inventory, stitch practice journal, pattern modification log, embroidery project queue, finished-work portfolio, gift-project planner, or seasonal embroidery challenge workbook. Each product gives customers another reason to return while allowing you to explore different search terms and audience needs.
Your $7 starter could contain essential project records and a simple finished-project page. The $17 version could add thread tracking, stitch logs, project queues, and pattern notes, while a $27 bundle could combine several specialized embroidery journals into one collection. A $47 Complete Embroidery Project Binder could bring all those tools together, while a $77 library could include multiple themed journals, trackers, reference pages, and reusable worksheets.
You could also create versions for specific embroidery styles. Floral embroidery, seasonal designs, embroidery gifts, modern hand embroidery, beginner stitching, textile art, and embroidery-business planning can each become separate product opportunities. The key is to expand because customers have related needs, not because you suddenly woke up one morning and decided the internet desperately needed 83 more embroidery PDFs.
A collection containing 40 well-designed embroidery planning and journaling products could potentially generate an additional $700 to $2,200 per month through bundles, repeat customers, memberships, complementary offers, and related products, although actual results will vary based on traffic, pricing, product quality, audience fit, and marketing. There are no guaranteed sales figures hiding between the thread charts, but a well-connected catalog can create multiple ways for the same audience to buy useful products. Trust me, you’ll thank me later when your product ladder starts looking like a thoughtful collection instead of a thundering herd of unrelated thingees.
Another option is to create a monthly or seasonal embroidery journal club. Members could receive fresh project pages, themed reflection sheets, stitch practice challenges, thread palette worksheets, and new organizational tools throughout the year. This can create a recurring-product opportunity while giving you a reason to keep developing new material for an audience you’ve already built.
Your Next Steps
Begin with one excellent project journal rather than trying to build an entire embroidery empire before breakfast. Create a strong project record, then add the thread tracker, stitch log, project queue, progress tracker, and finished-project page. Test every page by imagining that a real stitcher is using it with an actual project, because that will quickly reveal whether your writing spaces, prompts, and sections are genuinely useful.
Next, create your $7 starter product and one logical upgrade. Let customer questions and feedback show you which features deserve expansion into your $27 bundle or $47 complete system. If people repeatedly ask for thread inventory, pattern modification pages, or a better finished-project archive, you’ve just been handed product-development research without having to summon the marketing gods.
Then build content around the little problems your journal solves. Show stitchers how to document a project, organize thread information, preserve pattern changes, create a personal stitch library, and keep unfinished projects from disappearing into the creative fog. Offer one useful free project sheet, build your email list, and gradually introduce the larger journal system to people who already understand why preserving creative details matters.
Keep the first version practical, attractive, and easy to use. You can always add more thingees later, but you can’t easily remove the feeling of overwhelm after you’ve buried your customer under 140 pages of worksheets before they’ve even stitched their first flower. That’s it. That’s your beginning!
Final Thoughts
Embroidery project journals have an appealing combination of organization, creativity, and sentiment. They help stitchers remember the technical details that make projects reproducible while also preserving the stories and memories that make handmade work meaningful. That gives you an opportunity to create a digital product that isn’t merely useful today but can become a treasured record of someone’s creative life.
The strongest journal will feel like it was designed by someone who understands what actually happens during a project. It will make room for thread colors, fabric choices, stitches, pattern changes, measurements, progress, mistakes, discoveries, photographs, and finished-project reflections. It will also give users enough flexibility to document projects in their own way, because creativity doesn’t always follow the tidy little arrows we put on our planning pages.
From there, the product ladder can grow naturally. Start with a simple project journal, expand into thread and stitch trackers, add themed collections, create business-oriented editions, and eventually build a comprehensive embroidery journal library. Keep solving real organizational problems, preserve the creative details that customers care about, and make every new thingee useful enough that someone can look at it and say, “Oh, I need that.”
If you were creating your first embroidery project journal tomorrow morning, which detail would you most hate to forget about a favorite project: the thread colors, the stitches, the pattern changes, the inspiration, or the story behind why you made it? Start there and build the first pages around that need, then add the other useful pieces as your idea grows. Give stitchers a place to preserve what they created and what they learned, and you may have the beginning of a digital product business that keeps getting more valuable with every project.
Enjoy!