
Introduction
Running a small handmade business can be wonderfully creative, but the money side can become surprisingly messy when receipts, supply purchases, shipping costs, booth fees, packaging expenses, and random little thingees start piling up. One minute you’re happily making candles, jewelry, pottery, crafts, or sewn goods, and the next minute you’re staring at a collection of receipts wondering which ones belong to the business and which ones were from that completely unrelated shopping trip. That’s Not a Good Thing, especially when you’re trying to understand whether your creative business is actually making money.
That’s where a small handmade business expense tracker can become an extremely useful digital product. Instead of asking makers to build complicated spreadsheets or remember every purchase at the end of the month, you can give them simple pages that help them record expenses as they happen. A good tracker turns financial organization into a manageable habit, which is always a Good Thing when the alternative is discovering twelve months later that your “very profitable” craft business has apparently been sponsoring the local craft store.
For a digital-product creator, this niche also creates an opportunity to build a product ladder rather than selling one lonely printable. You could begin with a $7 expense tracker, expand it into a $17 business expense workbook, create a $27 profit-and-expense planner, develop a $47 complete handmade business finance binder, and eventually offer a $77 comprehensive business organization library. The goal is not to promise profits or replace professional accounting advice, but to give small creators practical tools for staying organized and making better-informed business decisions.
Quick Answer
A small handmade business expense tracker is a printable or digital record-keeping system that helps makers organize the money they spend while running their businesses. It can include pages for materials, packaging, shipping, equipment, marketplace fees, craft fairs, advertising, education, mileage, subscriptions, and other business-related expenses. The most useful versions keep the process simple enough that a busy maker will actually use them instead of putting the tracker into a folder labeled “Things I Will Deal With Later.”
The best product focuses on organization rather than making tax promises or telling customers what expenses they are legally allowed to claim. You can include helpful categories and spaces for notes, dates, vendors, amounts, payment methods, and receipt references while encouraging users to confirm tax rules with a qualified professional when necessary. That combination makes the product useful while keeping its purpose clear: helping creators maintain better records of their own business activity.
You can also turn the basic tracker into a product ladder with increasingly useful organization features. A $7 starter might contain monthly expense pages, a $17 version could add category summaries and receipt logs, a $27 workbook could include pricing and profit-planning worksheets, a $47 system could combine expenses with inventory and sales tracking, and a $77 library could bring everything together into a larger handmade-business organization toolkit.
Why This Niche Works
Small handmade businesses often begin with creativity rather than formal business systems. A maker may start selling products at a local market, through social media, on an online marketplace, or through friends and family before realizing there are dozens of little business expenses happening behind the scenes. Supplies need to be purchased, products need to be packaged, orders need to be shipped, booths may need to be paid for, and online platforms may take fees, which means the financial side can grow much faster than expected.
That creates a natural need for simple organization tools. Many makers do not want to become accountants, and they certainly do not want to spend their Sunday evening trying to decode a spreadsheet that looks like it was designed by someone who has never touched a glue gun. They simply want to know what they spent, where the money went, and how those expenses relate to the business they are building.
This is also a strong niche because expenses vary by handmade business type. A candle maker may need categories for wax, fragrance, jars, labels, and packaging, while a jewelry maker may track beads, findings, tools, displays, and shipping supplies. A sewing business may have fabric, thread, patterns, machine supplies, packaging, and market fees, while a pottery business may have clay, glazes, kiln-related costs, studio expenses, and protective packaging.
That variation gives you room to create specialized versions without starting completely from scratch. Once you develop a strong core expense-tracking system, you can create niche editions for jewelry makers, candle makers, soap makers, crafters, fiber artists, woodworkers, pottery makers, sewing businesses, and other handmade creators. That’s a Good Thing because one well-designed framework can become the foundation for an entire collection of digital products.
What You Can Put Inside a Small Handmade Business Expense Tracker
Monthly Expense Tracking Pages
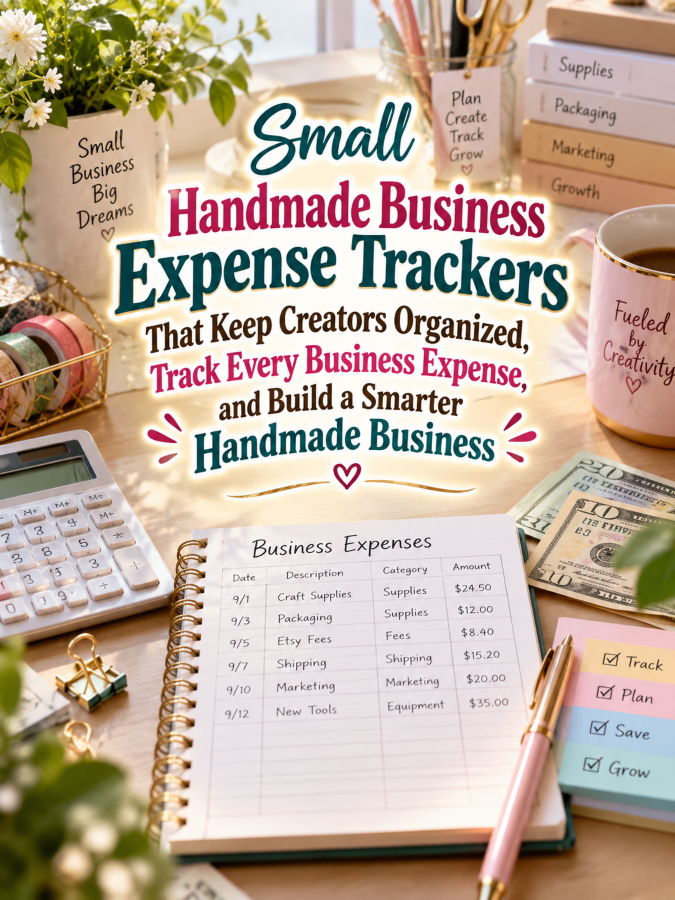
The foundation should be a simple monthly expense page where users can record the date, vendor, expense description, category, amount, payment method, and notes. Keeping these fields consistent makes it easier for a creator to review spending later instead of trying to reconstruct what happened from memory. Memory is lovely for remembering your child’s first steps, but it is considerably less impressive when you’re trying to remember why you spent $86.47 at a craft supply store three months ago.
Materials and Supplies Tracker
Create a dedicated section for materials because supplies can represent a large part of a handmade business’s spending. Include fields for the material, supplier, quantity, purchase date, amount spent, and notes about which products use the material. This can help makers connect purchasing decisions with their actual product-making activities.
Packaging and Shipping Expenses
Packaging expenses can be easy to overlook because individual purchases may seem small. Add pages for boxes, mailers, tissue paper, labels, tape, inserts, shipping materials, and other related purchases so creators can see how these costs accumulate. You could also include a simple shipping-expense summary that lets users compare spending across months without turning the process into a giant accounting adventure.
Craft Fair and Market Expenses
Many handmade businesses sell at markets, fairs, pop-ups, and local events, so this deserves its own section. Include spaces for booth fees, display materials, signage, table supplies, event-related transportation notes, promotional materials, and other costs the creator wants to record. A dedicated page makes it easier to review whether particular events were worth the time and expense from the creator’s own business perspective.
Subscriptions and Business Services
Digital businesses and handmade businesses increasingly use online services, so your tracker can include a section for recurring subscriptions and business tools. Give users space to record the service name, billing frequency, amount, renewal date, and business purpose. This can help creators spot forgotten subscriptions before they become permanent residents of the bank statement.
Receipt and Document Log
A receipt log can make the tracker much more useful because recording the expense is only part of staying organized. Include fields for the receipt date, vendor, amount, category, storage location, and reference number or note. Encourage users to follow whatever document-retention practices apply to their situation and to keep important records in an appropriate secure location.
Monthly Spending Summary
Add a summary page where users can total their spending by category for each month. You do not need to make this overly complicated because the real value is helping the creator see patterns. When someone notices that packaging, supplies, advertising, or marketplace fees are consistently much higher than expected, they have useful information to consider when reviewing pricing and business decisions.
Tools You’ll Need
You can create the visual pages and printable layouts with Canva, especially if you want to build a polished system with matching covers, worksheets, tables, and section dividers. Use Google Docs for drafting instructions, worksheet wording, customer guides, and simple planning content before moving the final design into your printable layout. Keeping your writing and design processes separate can save time and prevent you from trying to solve every problem inside one giant document.
For email marketing, you can use AWeber or GetResponse to build an audience around handmade-business organization. You could offer a free expense-category checklist or one-page monthly expense tracker as a lead magnet and then introduce the full product ladder through helpful emails. That’s a Good Thing because you’re building an audience that already has an interest in the exact problem your product solves.
For selling digital products, Gumroad can be used for straightforward digital-product delivery, while Teachable can become useful if you eventually expand from printables into courses, workshops, or a larger handmade-business education library. You can also use Amazon Handmade Business Expense Tracker Research to study how people describe their needs, what kinds of organization products already exist, and which features might help your product feel more useful and specific.
Your 5-Step Action Plan
Step 1: Choose Your Handmade Business Audience
Start by deciding who your first tracker is actually for. You could make a general tracker for handmade sellers, or you could choose a narrower audience such as candle makers, jewelry designers, sewing businesses, pottery makers, or craft-fair vendors. A specific audience makes it easier to choose relevant expense categories and write examples that feel immediately familiar.
Do not worry about excluding everyone else because niche products can often be easier to explain. A jewelry-maker expense tracker can speak directly about beads, findings, display materials, packaging, and market fees in a way that a generic business spreadsheet cannot. Once the core system works, you can adapt it for other handmade niches and build your collection from there.
Step 2: Build Your Core Expense Categories
Create a practical list of categories that covers common business spending without pretending every maker has the exact same expenses. Consider materials, packaging, shipping, equipment, tools, marketplace fees, marketing, craft fairs, subscriptions, education, and miscellaneous business costs. Keep the categories broad enough to be useful while leaving a notes area for expenses that do not fit neatly into a box.
You can make the system even more useful by adding a “custom category” option. That gives the customer flexibility while keeping your main pages clean and simple. Remember, your goal is not to create the most complicated tracker on the internet; your goal is to create the tracker someone will actually open next Monday.
Step 3: Add Review Pages
Recording expenses is useful, but reviewing them is where the information becomes more meaningful. Add monthly and quarterly review pages where creators can summarize spending, compare categories, identify unusual increases, and write notes about what they learned. These pages can help transform the tracker from a passive record into a simple business reflection tool.
You could include questions such as “Which expense surprised me?”, “Which supplies did I use most?”, “Which recurring cost should I review?”, and “What should I investigate next month?” These prompts encourage creators to think about their numbers without pretending the printable is providing professional financial advice. That’s always a Good Thing because the product remains practical, approachable, and focused on organization.
Step 4: Turn The Tracker Into A Product Ladder
Once your core tracker works, create different versions based on the amount of organization the customer wants. The $7 version can solve the basic problem, while the $17 and $27 versions can add more categories, summaries, receipt logs, and business review worksheets. Your $47 and $77 versions can combine expense tracking with related systems such as sales records, inventory organization, product costing worksheets, and business planning pages.
This approach lets you build value gradually instead of trying to create one enormous product from the beginning. It also gives customers a natural reason to upgrade when their handmade business becomes more complex. The thundering herd may be busy creating random spreadsheets with 47 tabs, but you can offer a clear system that says, “Start here, then grow when you’re ready.”
Step 5: Market The Outcome, Not The Spreadsheet
When promoting your product, avoid focusing only on the number of pages or the fact that it is printable. Explain what the customer can do with those pages, such as organize expenses, review spending patterns, prepare records for their own financial review process, and make more informed business decisions. People are rarely excited because a spreadsheet has twelve columns; they are excited because those twelve columns might finally help them understand where their money is going.
Create useful marketing content around real problems such as “Where Did My Craft Business Money Go?”, “What Expenses Should I Track?”, or “How To Organize Handmade Business Receipts.” Then demonstrate a page from your tracker and explain how it fits into the creator’s weekly routine. Five good messages beats 50 generic ones every single time, and that is especially true when your content teaches something useful before asking someone to buy.
Once you’ve figured out all of the above, the next step is turning your expense tracker into a practical handmade-business system that helps creators understand their spending, organize their records, and build better habits around the financial side of their creative work.
3 Ways to Stand Out From The Thundering Herd!
Way 1: Make It Handmade-Business Specific
One of the easiest ways to stand out is to stop making your expense tracker look like a generic accounting worksheet wearing a slightly prettier outfit. Handmade sellers have expenses that feel very different from those of a traditional office business, so your tracker should reflect that reality. Include categories and examples for materials, packaging, craft fairs, display supplies, marketplace fees, shipping supplies, tools, advertising, and other costs that makers are likely to encounter.
You can take this even further by creating versions for specific handmade niches. A candle maker could have categories for wax, fragrance, jars, wicks, labels, and packaging, while a jewelry maker might need spaces for beads, findings, tools, displays, and shipping supplies. That’s a Good Thing because the more naturally your tracker fits someone’s business, the less time they have to spend figuring out how to adapt a generic template.
Way 2: Add “Where Did My Money Go?” Reviews
Most expense trackers are good at recording numbers and surprisingly bad at helping people understand them. Add monthly review pages that turn those numbers into simple questions, such as which category increased the most, which purchase was unexpected, and which recurring cost deserves another look. You are not telling the customer what financial decision to make, but you are helping them notice patterns worth considering.
A simple “money snapshot” page could show total expenses by category alongside notes about what happened during the month. You could also include a space for the creator to write down major purchases and whether the purchase supported a specific product, event, or business activity. Suddenly, your printable is no longer just a place where numbers go to sit quietly; it becomes a business reflection tool, and that’s always a Good Thing.
Way 3: Connect Expenses To Products
Handmade creators often think about expenses separately from the products they sell, but connecting the two can make the tracker much more useful. Add optional pages where users can note which materials or purchases relate to particular products or collections. This can help them organize their own product-development information and identify costs they may want to consider when reviewing their pricing and business model.
For example, a maker could record that a particular supply purchase was intended for a seasonal collection or a specific craft-fair display. Another creator might discover that one product requires significantly more packaging or specialized materials than another. This does not automatically tell the creator what their prices should be, but it gives them better information to consider when making business decisions.
3 Nifty Ways to Find Customers
Way 1: Create “Where Did My Money Go?” Content
Build your marketing around the very real feeling that small-business money can disappear through dozens of tiny purchases. Create posts showing how a maker can organize supplies, packaging, market fees, subscriptions, and other expenses into clear categories. A headline like “The 10 Handmade Business Expenses You Keep Forgetting to Track” gives you an educational topic that naturally introduces your tracker without immediately shouting about the product.
You can also demonstrate a fictional example of a maker reviewing one month’s expenses and discovering patterns they had not noticed before. Keep the example educational rather than presenting it as a promise that tracking expenses will automatically increase profits. That’s a Good Thing because your audience gets useful information while also seeing exactly why an organized expense system could become part of their regular business routine.
Way 2: Offer A Free Expense Category Checklist
Create a simple one-page checklist that helps handmade sellers brainstorm the types of expenses they may want to discuss with their accountant or financial professional. The checklist could include materials, packaging, shipping, marketplace fees, marketing, craft fairs, equipment, subscriptions, and other general categories. Make it clear that the checklist is an organizational tool rather than tax advice, because tax rules can vary based on location and individual circumstances.
Use the free checklist as a lead magnet for your email list and follow it with a short educational sequence. One email could explain why recording expenses regularly is easier than reconstructing them months later, while another could demonstrate a monthly review routine. Then introduce the full tracker as the natural next step for someone who wants the complete system, because five useful messages beat 50 generic “Hey, buy my thingee!” messages every single time.
Way 3: Partner With Handmade-Business Communities
Look for places where handmade sellers already gather, including craft-business groups, maker communities, newsletters, podcasts, workshops, and educational channels. Instead of dropping promotional links everywhere like confetti at a parade, contribute genuinely useful advice about organizing expenses and keeping business records. Your goal is to become the person associated with making the money side of handmade business feel simpler.
You can also create collaborations with educators who teach handmade business skills, pricing, selling at markets, Etsy organization, or product photography. A free workshop about “Getting Your Handmade Business Records Organized” could naturally lead into your tracker as an optional resource. That’s always a Good Thing because the audience is already interested in the exact problem your product helps organize.
3 Takeaways You Won’t Find Elsewhere!
Takeaway 1: Tiny Expenses Are Worth Organizing
A handmade business can accumulate many small purchases that feel too insignificant to record individually. Packaging tape, labels, shipping materials, display hooks, sample supplies, small tools, and other purchases can become meaningful when they happen repeatedly throughout the year. The purpose of your tracker is not to declare which expenses matter for tax purposes, but to help the creator maintain a clearer record of the business activity they choose to track.
This makes a “small expenses” page a surprisingly valuable addition to your product. Give users a place to record those purchases immediately rather than trusting themselves to remember them later. That’s Not a Good Thing when the entire financial history of a business depends on someone’s memory after six months of craft fairs, shipping boxes, and late-night supply runs.
Takeaway 2: Expense Tracking Can Reveal Product Opportunities
When makers review their spending, they may notice which supplies they repeatedly purchase and which product categories consume the most resources. That information can inspire questions about which products are worth expanding, which supplies could be purchased more efficiently, or which collections might deserve another look. Your tracker should not make those decisions for them, but it can give them a structured place to notice patterns.
You can add a “Business Observations” page where creators write down discoveries after each monthly review. A maker might realize that a certain seasonal collection requires extra packaging, or that a particular product uses supplies they are constantly reordering. These observations can become useful inputs for future planning, and suddenly the humble expense tracker has become a tiny business detective.
Takeaway 3: Organization Products Can Lead To Other Products
An expense tracker naturally connects with many other handmade-business organization needs. Once someone has a system for expenses, they may also want inventory trackers, sales logs, order planners, craft-fair planners, product costing worksheets, wholesale order trackers, or business goal planners. That means your first product can become the beginning of a larger product ecosystem rather than a one-and-done printable.
Think of each product as solving one piece of the same customer’s business puzzle. The expense tracker organizes spending, the inventory tracker organizes supplies and products, the sales tracker organizes revenue records, and the business planner brings the bigger picture together. That’s a Good Thing because you’re creating a logical collection instead of randomly producing thingees whenever you get a new idea at 11:47 PM.
3 Common Mistakes to Avoid
Mistake 1: Making Tax Claims You Cannot Support
Financial organization and tax advice are not the same thing. Avoid telling customers that specific expenses are definitely deductible or that your tracker guarantees tax compliance because tax rules depend on factors such as location, business structure, and individual circumstances. Instead, position your product as a record-keeping and organization tool and encourage customers to consult an appropriately qualified professional for tax questions.
You can still make the tracker extremely useful without making complicated claims. Give users clear categories, notes fields, receipt references, monthly summaries, and spaces to record information they can later review with their own financial professional. That’s always a Good Thing because the product stays firmly in its lane while still solving a very practical problem.
Mistake 2: Making The Tracker Feel Like Accounting Homework
Creators already have enough tasks competing for their attention, so your tracker should not feel like a punishment for having a creative business. Use simple instructions, clear tables, logical categories, and plenty of writing space so users can understand what to do without reading a 14-page manual. If opening the tracker makes someone sigh dramatically before touching a single pen, something needs fixing.
Consider including a quick-start page that explains a simple weekly routine. For example, the user could record expenses during the week, attach or store supporting receipts according to their own record-keeping process, and complete a short review at the end of each month. The system should feel manageable enough to become a habit rather than another ambitious organizational project that lasts exactly four days.
Mistake 3: Forgetting Different Handmade Business Models
Not every handmade creator sells the same way. Some sell online, some attend markets, some take custom orders, some sell wholesale, and some combine several sales channels at once. If your tracker assumes every creator has the same expenses, you may accidentally make a useful product feel oddly irrelevant.
Add flexible categories, custom fields, and optional pages so customers can adapt the system to their own businesses. You can also create specialized versions later for different maker types and sales models. The thundering herd may be happy with one generic spreadsheet, but your opportunity is to make customers feel like you actually understand how their particular handmade business works.
Scaling Your Results
Once your starter expense tracker is complete, build the product ladder around increasing organization rather than simply adding more pages. Your $7 starter can focus on monthly expense recording, while the $17 version adds receipt logs and category summaries, and the $27 version adds monthly and quarterly business-review worksheets. The $47 level can combine expenses with sales, inventory, and product-cost organization, while the $77 level can become a comprehensive handmade-business record-keeping and planning library.
You can also create niche editions from the same basic framework. Candle makers, jewelry makers, soap makers, sewing businesses, pottery studios, fiber artists, woodworkers, and craft-fair sellers can each receive examples and categories that make sense for their work. That’s a Good Thing because you can expand your catalog while keeping your underlying product architecture consistent.
A collection of 40 well-designed handmade-business organization products could potentially generate an additional $700 to $2,200 per month through bundles, repeat customers, memberships, and complementary offers, although actual results will vary based on traffic, pricing, product quality, audience fit, and marketing. The important part is not the number itself but the structure behind it: one customer problem can lead naturally to several related products. Trust me, you’ll thank me later when your product catalog starts behaving like a business ecosystem instead of a garage sale of unrelated PDFs.
Your Next Steps
Start by choosing one handmade-business audience and building the simplest useful expense tracker for that customer. Give them clear monthly pages, practical categories, a receipt log, and a simple review page before adding every feature you’ve ever imagined. Your first version should solve one obvious problem extremely well, because clarity is much more valuable than stuffing 93 pages into a bundle just because you can.
Next, test the tracker yourself by pretending you are the customer. Record a few imaginary supply purchases, packaging expenses, craft-fair costs, subscriptions, and other business expenses to see whether the categories make sense and whether the pages have enough room to be genuinely useful. If you find yourself asking, “Where am I supposed to put this?” your customer probably will too, and that’s Not a Good Thing.
Then build your marketing around education and demonstration. Show makers how to organize expenses, explain why regular record keeping can be easier than reconstructing information later, demonstrate your pages, and share simple business-organization tips. Once people understand the problem and see your system solving it, your product has a much better chance of standing out from the thundering herd of generic spreadsheets.
Final Thoughts
Small handmade business expense trackers may not sound as glamorous as a beautiful product planner or colorful craft journal, but they solve a problem that can quietly affect almost every growing handmade business. A simple system can help creators organize what they spend, review their records, spot patterns, and prepare information they may later discuss with a financial professional. That makes this niche especially attractive for digital-product creators because the product provides practical value without requiring you to promise a particular financial outcome.
The bigger opportunity comes from building around the customer rather than around the spreadsheet. Once a handmade seller needs help organizing expenses, there is a natural path toward inventory, sales, order, craft-fair, product-costing, business-goal, and planning products. That’s a Good Thing because your first expense tracker can become the front door to an entire collection designed for one very specific audience.
Keep the pages simple, make the categories flexible, include useful review prompts, and remember that the best tracker is the one someone will actually use. You do not need to create the fanciest financial workbook on the planet, and you certainly do not need to turn your customer into a part-time accountant. You need to give a busy maker a simple place to capture the numbers, understand their own records, and feel a little more in control of the business they are building.
That’s it. That’s your beginning! Start with one handmade-business expense problem, create one genuinely useful solution, and then let customer questions show you where the next product should go. If you were creating your first small handmade business expense tracker tomorrow morning, which type of maker would you design it for, and which expenses would you help that maker organize first?
Enjoy!