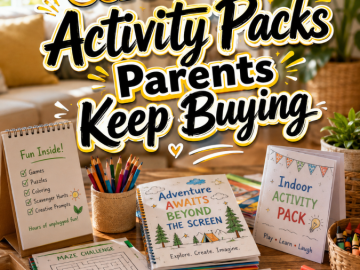
Parents don’t need another folder full of random activity ideas.
They need something they can actually use.
Something that helps them answer questions like: “What are the kids doing today?” “What can I set up without spending an hour searching Pinterest?” and “Where did I put that activity we used last month?”
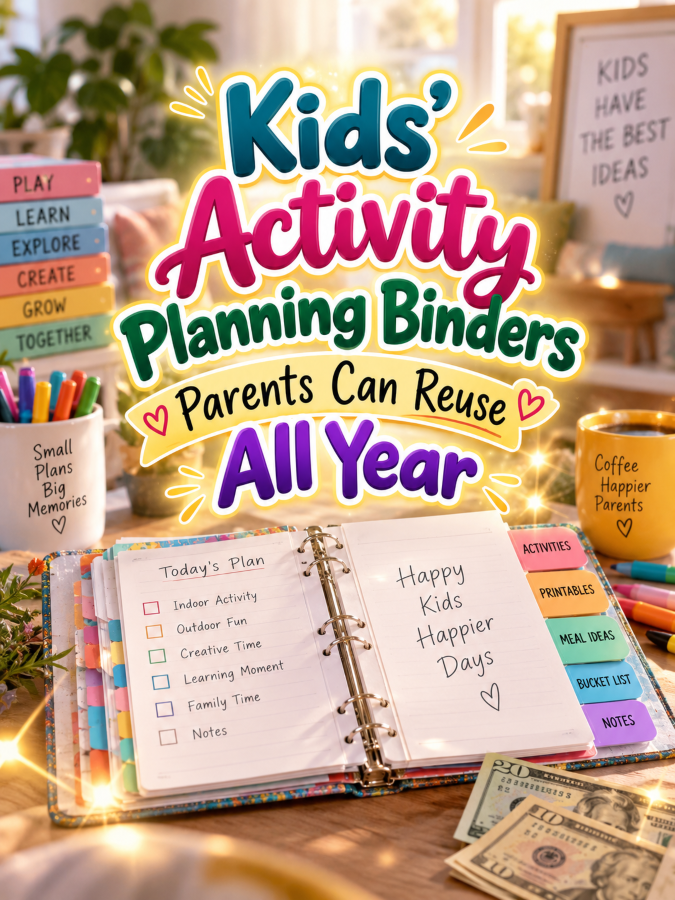
That’s where Kids’ Activity Planning Binders Parents Can Reuse All Year can become a practical digital product.
You can create a printable planning binder that helps parents organize activities by season, age, interest, or type. The buyer prints the pages, puts them in a binder, adds new activity ideas over time, and reuses the system throughout the year.
And the reusable part is the real selling point.
You’re not simply selling activity pages. You’re selling a system that helps parents organize the activities they already want to do.
Quick Answer
Create a printable kids’ activity planning binder with reusable planning pages, activity idea sheets, seasonal sections, supply lists, trackers, and spaces for parents to record what worked. Package it as a downloadable PDF that parents can print and keep using throughout the year.
Start with one clear age group and one simple planning system, then test the idea before expanding it with more activity categories, seasonal pages, or bonus resources.
Now that the basic idea is clear, let’s look at why a reusable binder can solve a real planning problem.
Why Parents May Want a Reusable Activity Binder
Kids’ activities are easy to collect and surprisingly hard to organize.
One idea gets saved on Pinterest. Another lives in a screenshot. A supply list is sitting in a phone note. Then somebody remembers an activity that worked beautifully three months ago, but nobody can remember what it was called.
Sound familiar?
A planning binder gives all those loose ideas a home.
It can help parents organize:
- Indoor activities
- Outdoor activities
- Rainy-day activities
- Quiet-time activities
- Creative projects
- Learning activities
- Family activities
- Seasonal activities
- Holiday activities
- Screen-free activities
The goal isn’t to tell parents how to raise their children or fill every minute of the day.
The goal is to make activity planning easier.
Once you understand that, the product becomes much easier to build.
Next, let’s look at what should actually go inside the binder.
What to Include in a Kids’ Activity Planning Binder
Here’s how you turn the idea into something buyers can use.
1. Year-at-a-Glance Planning Page
Give parents a simple way to see the year.
They could mark birthdays, school breaks, vacations, holidays, family events, and other dates when they may want extra activities ready.
Keep the page simple. It should be useful at a glance, not become a calendar that requires a degree in spreadsheet engineering.
2. Monthly Activity Planner
Create a page for each month where parents can write down activity ideas.
Include sections such as:
- Activities to try
- Supplies needed
- Activities to repeat
- Activities to save for later
- What worked
This creates a simple planning loop.
Plan it. Try it. Record it. Reuse it.
3. Activity Idea Cards
Create individual printable cards for activities.
Each card could include:
- Activity name
- Suggested age range
- Estimated time
- Supplies
- Simple instructions
- Indoor or outdoor label
- Notes section
Parents can print the cards, cut them out, and store them in a binder pocket or section.
That makes the binder feel more like a reusable activity library.
4. Supply Inventory Pages
This can be one of the most practical sections.
Parents can keep track of supplies they already have, such as:
- Construction paper
- Crayons
- Markers
- Glue
- Paint
- Cardboard
- Craft sticks
- Reusable containers
You can also include a “buy next” section.
That way, parents can plan activities around supplies they already own instead of discovering at 4:30 PM that the craft requires 17 craft sticks and exactly one purple pom-pom.
5. Activity Rating Page
Give parents a way to record which activities were hits.
They could rate each activity based on:
- Kids enjoyed it
- Easy to prepare
- Low-cost
- Mess level
- Would do again
Now the binder becomes more valuable over time because the parent is building a personal collection of proven activities.
And that’s an important product feature.
The binder gets more useful the longer it is used.
With the core pages mapped out, let’s narrow down who you’re actually creating this for.
Choose a Specific Parent Audience
You could create a general activity binder.
But a more focused product may be easier to explain and market.
Consider building for a specific audience, such as:
- Parents of preschoolers
- Parents of elementary-age children
- Homeschooling families
- Parents planning screen-free activities
- Families looking for low-cost activities
- Parents who enjoy seasonal activities
- Parents planning summer activities
- Families preparing rainy-day activity collections
You can narrow the concept even further.
For example:
“Year-Round Activity Binder for Preschool Parents”
or
“Screen-Free Kids’ Activity Planner for Busy Families”
Those titles tell the buyer more than a broad phrase like “Kids’ Activity Binder.”
Specificity helps the right person recognize the product faster.
Before you start designing, though, let’s make sure you’re solving a problem parents actually care about.
How to Validate the Product Idea
Don’t spend two weeks designing 80 pages before checking whether your idea makes sense to your audience.
Start with research.
Look at conversations where parents discuss activities, planning, boredom, school breaks, screen time, crafts, and family routines.
Pay attention to repeated questions.
For example:
- “What can I do with my kids when it’s raining?”
- “What activities can I prepare ahead of time?”
- “How can I organize all these activity ideas?”
- “What can my kids do without a screen?”
- “What can I do with supplies I already have?”
Those questions can help you decide what belongs in the binder.
You’re looking for a pattern.
Repeated problems can become product ideas.
Once you’ve found the problem, you can build the first version around it.
Now let’s turn that research into a simple product-building process.
How to Create the Binder Step by Step
Step 1: Pick One Main Promise
Decide what the binder is supposed to help parents accomplish.
For example:
“Plan and organize simple kids’ activities all year without starting from scratch every week.”
That’s a clear promise.
Everything you add to the binder should support it.
Step 2: Build the Binder Sections
Create a simple structure before designing individual pages.
A starter binder might include:
- Cover page
- How to use the binder
- Yearly planning page
- Monthly planners
- Weekly activity planners
- Activity idea cards
- Supply lists
- Seasonal activity sections
- Activity rating pages
- Notes pages
You can add more later.
Start with the pages that support the main promise.
Step 3: Add Reusable Categories
Make the binder easy to customize.
Use category labels such as:
- Art
- Movement
- Reading
- Science
- Outdoor play
- Quiet time
- Family time
- Seasonal fun
Parents can then add their own activity ideas without needing to buy another planner every month.
Step 4: Design for Printing
You can create the pages with a design platform such as Canva.
Think about how the finished pages will look inside a real binder.
Leave enough writing space.
Use readable fonts.
Keep important information away from the punch-hole area.
And make sure the pages still look good when printed in black and white if you want to make the product more budget-friendly.
Step 5: Test the Binder
Print it.
Actually put the pages into a binder.
Use them as if you were the buyer.
Can you find an activity quickly? Is there enough room to write? Are the categories clear? Does the order make sense?
This simple test can reveal problems that aren’t obvious on your computer screen.
With the product built, the next question is what you can reasonably charge.
How to Price a Kids’ Activity Planning Binder
Pricing depends on the size, depth, design quality, and usefulness of the finished product.
You might test different ranges such as:
- $5-$9: Smaller activity planners or mini binder packs.
- $10-$17: More complete year-round planning binders.
- $18-$29: Larger systems with extensive activity libraries, seasonal sections, trackers, and bonuses.
These are starting points for testing, not guaranteed market prices or income levels.
A 15-page planner and a 100-page activity system shouldn’t be treated as identical products.
But don’t fall into the trap of stuffing the binder with filler pages just so you can charge more.
More pages do not automatically mean more value.
Useful pages do.
And the more clearly you solve the parent’s planning problem, the easier it becomes to explain why the product is worth buying.
Next, let’s talk about how to get that product in front of parents.
How to Promote Your Activity Planning Binder
This product gives you plenty of content ideas.
You can teach while showing people how the binder works.
Create posts or short videos around topics such as:
- Five screen-free activities for rainy days
- How to organize kids’ activity supplies
- Simple activities for school breaks
- How to build a reusable activity library
- Low-prep activities for busy parents
- Ways to reuse household materials for activities
- How to plan a month of activities in advance
Then show a sample page from your binder.
Give potential buyers a reason to understand the product before asking them to purchase it.
Pinterest can be useful for visual discovery, while parent-focused social communities may help you learn which problems are getting the most attention.
If you sell on a marketplace, make the listing easy to understand.
Show several interior pages.
Explain what is included.
State the file format.
Explain whether the product is intended for personal use and how the files can be printed.
Clear information builds trust.
Before you publish, though, there are a few mistakes worth avoiding.
Common Mistakes to Avoid
Making It Too General
“Activities for kids” covers a huge range.
Choose an age group, need, or planning problem that gives the product a sharper purpose.
Creating Too Many Pages
A giant binder isn’t automatically a better binder.
Every page should help the parent plan, organize, choose, record, or reuse an activity.
Forgetting the Parent’s Time
Parents may be buying this because they want less planning work.
If every activity takes 90 minutes to prepare, the binder may defeat its own purpose.
Include simple activities and make preparation requirements clear.
Making the Pages Hard to Print
Fancy backgrounds can look attractive on a screen but use a lot of ink.
Give parents a practical option.
Clean design often wins here.
Using Other People’s Content Without Permission
Create original content or use assets according to their licenses.
Don’t copy another creator’s activity cards, illustrations, worksheets, or written instructions and package them as your own product.
Your binder should be your own useful system.
With those risks handled, let’s look at how you can grow the idea without creating a completely new business every month.
How to Expand the Product Later
Once your first binder is working, you can create related versions for the same audience.
For example:
- Summer Activity Planning Binder
- Rainy-Day Activity Binder
- Holiday Activity Planning Binder
- Travel Activity Binder
- Screen-Free Weekend Activity Binder
- Preschool Activity Planning Binder
- After-School Activity Binder
You could also create smaller add-on packs.
For example, a buyer might already own the year-round binder and later purchase a seasonal activity pack that fits into it.
That’s a smart expansion path because you’re serving the same general customer with related problems.
You don’t need to start from zero every time.
And the best part?
Your original binder can become the foundation for future products.
Now let’s turn the whole idea into a simple plan you can follow.
Your Simple Action Plan
Here’s what you can do this week.
- Choose one parent audience.
- Pick one main planning problem.
- Research the questions parents are already asking.
- List 20 useful activity ideas.
- Create your binder sections.
- Design a small first version.
- Print and test the pages.
- Ask a few parents for feedback if you can.
- Improve the confusing or unnecessary pages.
- Publish the finished product and create helpful promotional content.
Don’t try to create the ultimate parenting activity encyclopedia on your first attempt.
Start with one useful system.
Make it easy to understand.
Make it easy to print.
Make it easy to reuse.
Then listen to your buyers.
That’s how you find out what deserves to be added next.
Final Thoughts
Kids’ Activity Planning Binders can be a practical digital-product idea because they solve a simple problem: parents often have plenty of activity ideas but need a better way to organize and reuse them.
Your job is to make that organization easier.
Build pages that help parents plan activities, track supplies, remember what worked, and prepare for different seasons and situations.
Don’t sell a pile of printable pages. Sell a useful planning system.
That distinction can shape everything from your product title to your page design to your marketing message.
And you don’t need to build the whole thing today.
Choose one audience. Pick one planning problem. Create your first 10 useful pages.
Then test them.
Your next move is simple: write down the one sentence that explains how your binder will make a parent’s life easier.
Start there.
Here’s what you uncovered today. If something made you pause, smile, or feel curious, follow that spark and start working toward it today. Momentum begins with one decision.
Enjoy!