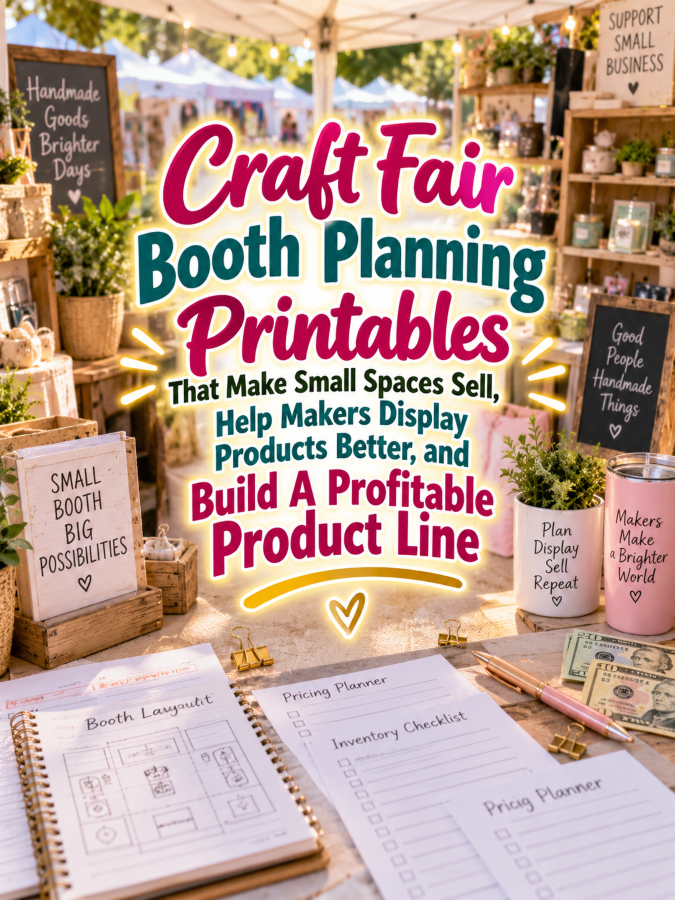
Introduction
A craft fair booth can be tiny, but that doesn’t mean your sales potential has to be tiny too. Makers often arrive with boxes of handmade products, stacks of signs, tablecloths, baskets, displays, price tags, and approximately seventeen things they suddenly realize they forgot. The booth may only be a few feet wide, but somehow it can develop the organizational complexity of a small department store.
That’s where craft fair booth planning printables can become incredibly useful. A well-designed planning system can help makers decide what to bring, how to arrange products, where to place signage, how much inventory they need, what supplies belong in the emergency kit, and how to make the booth easy for shoppers to understand. Instead of arriving at the event and playing “Where Should This Thingee Go?”, the seller can arrive with a plan.
And here’s the business opportunity hiding underneath all those tablecloths and display baskets: craft fair vendors don’t just need pretty booth ideas. They need help making limited space work harder, and that is a problem worth solving. When your printable helps a maker turn a crowded table into a clear, attractive, easy-to-shop display, you’re selling organization, confidence, and a better customer experience rather than merely selling another PDF.
Quick Answer
A craft fair booth planning printable is a practical planning system that helps handmade sellers prepare their booth layout, inventory, signage, displays, supplies, pricing, checkout area, and event-day tasks. You can create a simple booth checklist, a visual layout planner, an inventory worksheet, a complete vendor workbook, or a reusable craft fair booth binder. The strongest products help sellers make better decisions before they arrive at the event.
A $7 starter product could include a booth setup checklist, inventory checklist, packing list, and simple table-layout worksheet. A $17 expanded planner could add display planning, signage planning, product placement worksheets, and event-day checklists, while a $27 workbook could provide a complete craft fair preparation system. A $47 binder could organize multiple events throughout the year, and a $77 comprehensive vendor library could include booth planning, inventory management, pricing worksheets, sales tracking, event evaluation, seasonal planning, and bonus templates.
The big idea is simple: small booth spaces require smart decisions. If your printable helps a seller figure out what deserves prime table space, what can go vertically, what should stay within easy reach, and how shoppers will move through the display, you’ve created something much more useful than a generic craft fair checklist. That’s it. That’s your beginning!
Why This Niche Works
Craft fair sellers often have limited physical space and a surprisingly large amount of inventory. A maker may have dozens of products but only one six-foot table, which means bringing everything isn’t necessarily the best strategy. A booth planner helps sellers decide what to display, what to keep in backup storage, and how to create a presentation that feels organized instead of crowded.
The niche also works because craft fair preparation involves many different tasks. Sellers need to think about inventory, pricing, signage, payment methods, packaging, transportation, displays, lighting, weather, customer flow, marketing materials, and event rules, while also remembering the snacks because apparently humans still require food during business operations. That gives you plenty of useful sections to turn into a comprehensive planning product.
There is also a strong repeat-use opportunity because many makers attend more than one event. A vendor might participate in a spring market, summer festival, fall craft fair, holiday market, and several smaller local events throughout the year. A reusable planner that helps them prepare for every event can become much more valuable than a one-time checklist.
What You Can Put Inside Craft Fair Booth Planning Printables
1. Booth Layout Planner
The booth layout page should help sellers visualize their space before they arrive. Include a simple overhead diagram where they can mark the table, shelves, racks, signage, checkout area, baskets, product displays, and walking space. You can offer several common booth sizes so sellers can choose the layout that best matches their event.
You could also include a blank grid that lets customers create their own layout from scratch. Add prompts such as “Hero Product,” “Best Seller,” “Impulse Items,” “Checkout,” and “Signage” to encourage strategic placement. The goal is to help sellers think about shopper movement rather than simply filling every empty inch with products.
2. Booth Display Planner
A display planner can help makers decide how products should be presented at different heights and positions. Include sections for tabletop displays, risers, shelves, hanging displays, baskets, trays, stands, and vertical signage. This gives sellers a visual way to experiment before spending event-day energy moving the same basket around seventeen times.
You can also add a “What Do Shoppers See First?” section because first impressions matter. Encourage sellers to identify one or two products or displays that should immediately attract attention. When everything is screaming for attention, nothing gets heard, and that’s Not a Good Thing.
3. Inventory Planning Sheet
An inventory worksheet can help sellers estimate how many units of each product they should bring. Include columns for product name, quantity on hand, quantity to display, backup quantity, price, and notes. You could also add a section for best sellers so vendors can make sure their strongest products receive enough inventory and display space.
This section becomes especially useful for makers who sell products at different price points. A seller may want inexpensive items near the front to encourage impulse purchases, while higher-priced pieces might deserve more prominent display space and additional information. Your planner can help them think through that strategy before the event begins.
4. Product Placement Planner
Not every product deserves the same position in a booth. Create worksheets that help sellers identify their best sellers, newest products, seasonal products, premium products, giftable items, and impulse purchases. This gives them a reason to place products intentionally instead of arranging everything according to whatever box they unpack first.
You could even create a simple “Hot Zone / Warm Zone / Support Zone” framework. The hot zone can feature attention-grabbing products, the warm zone can contain complementary items, and the support zone can hold additional products that shoppers can discover as they browse. This gives a small booth a merchandising strategy without requiring the maker to become a retail-store consultant overnight.
5. Signage Planner
Signs can help shoppers understand what the booth sells before they even start browsing. Include planning spaces for the main business sign, product-category signs, prices, bundle offers, payment information, social-media handles, and special promotions. You can also include prompts for checking whether signs are readable from several feet away.
A signage worksheet could ask the seller what message each sign needs to communicate. Instead of creating twelve tiny signs that compete with one another, the maker can choose a few important messages and make them easy to understand. Clear signage can make a small booth feel much more professional, and professional is always a Good Thing.
6. Craft Fair Packing Checklist
The packing checklist is where your printable can become a genuine lifesaver. Include inventory, table coverings, displays, signs, price tags, bags, packaging, payment equipment, extension cords, lighting, chargers, tape, scissors, pens, cleaning supplies, water, snacks, and emergency supplies. Leave several blank lines so vendors can add the weirdly specific thingees that only their particular business requires.
Create separate checklist categories for products, display materials, sales supplies, personal items, technology, and emergency supplies. This makes the checklist easier to scan when someone is packing at 6:00 in the morning while wondering whether they remembered the card reader. A good checklist reduces mental load before the event, and that’s exactly the kind of problem customers will happily pay you to help solve.
7. Event-Day Setup Checklist
A setup checklist can guide sellers through the process from unloading the vehicle to opening the booth. Break the process into logical stages such as unload, assemble, display, price, test payment systems, organize backup inventory, clean the booth, and complete a final shopper-view check. This keeps the maker from spending forty minutes decorating one corner while the other three corners look like they were hit by a craft tornado.
You can also include a final “Ready For Customers?” checklist. It might cover visible prices, working payment methods, readable signs, accessible products, stocked bags, charged devices, and a clean checkout area. This small final inspection can become one of the most useful pages in the entire product.
8. Craft Fair Event Review
Don’t stop your planner when the event ends because the post-event review is where sellers can collect valuable business information. Include spaces for total sales, best-selling products, slow-moving products, customer questions, popular price points, display observations, inventory shortages, and things the seller would change next time. This turns every craft fair into a learning opportunity.
You can also include questions such as “Which product attracted the most attention?”, “What did customers ask for that you didn’t have?”, and “Which display received the most comments?” These answers can influence future inventory and booth decisions. Now your planner isn’t merely helping someone prepare for one event; it’s helping them become a smarter vendor over time.
Tools You’ll Need
Canva: Canva can help you design booth diagrams, inventory sheets, packing checklists, signage planners, worksheets, and attractive printable covers. Because this niche is highly visual, Canva is especially useful for creating simple booth-layout illustrations that customers can understand immediately.
Google Docs: Google Docs can help you draft checklists, planning questions, instructions, worksheets, and product descriptions before moving them into your final design. It is also handy when you’re building a larger workbook and want to organize the content before worrying about fonts, boxes, and thingees.
AWeber: AWeber can help you build an email audience of handmade sellers, craft fair vendors, and creative entrepreneurs. A free booth packing checklist or mini layout planner can work as a lead magnet that introduces potential customers to your paid planning products.
GetResponse: GetResponse can help you create email campaigns around craft fair preparation, booth display ideas, inventory planning, seasonal markets, and vendor organization. Five good messages beats fifty generic ones every single time, especially when your audience is busy preparing products for an actual event.
Gumroad: Gumroad can be used to sell downloadable booth planners, craft fair checklists, vendor workbooks, display planners, and larger bundles. A simple digital delivery system makes it easy for customers to purchase a planner and print it whenever their next market appears on the calendar.
Teachable: Teachable could become useful if you eventually expand your printable business into short courses about craft fair preparation, booth merchandising, product presentation, pricing, or event strategy. Your printable can become the workbook that supports a larger educational offer.
Amazon Research: Amazon craft fair booth planner research can help you study related vendor planners, craft fair organizers, display resources, and handmade-business products. Pay close attention to what buyers appear to want, what features repeatedly show up, and where existing products seem to leave gaps.
Your 5-Step Action Plan
Step 1: Choose Your Craft Fair Seller
Begin by choosing the type of maker you’re helping. Your audience could be jewelry makers, candle makers, soap makers, crocheters, artists, woodworkers, paper crafters, sewists, pottery makers, or general handmade sellers. A focused audience makes it easier to create examples and features that feel immediately relevant.
For example, a jewelry vendor may need display racks and small-item merchandising ideas, while a clothing seller may need hanging displays, sizing organization, mirrors, and garment racks. A candle seller may need scent categories, product grouping, and inventory tracking, while an artist may need print displays and packaging stations. The more clearly you understand the seller, the easier it becomes to create a planner that feels like it was made specifically for them.
Step 2: Solve The Small-Space Problem
Make limited space the central problem your planner solves. Teach sellers to think vertically, group products logically, create focal points, and protect enough open space for shoppers to browse comfortably. You don’t need to promise that your planner will magically make a six-foot table behave like a boutique because, sadly, Canva has not yet invented that particular wizardry.
Instead, give sellers practical planning tools that help them decide what belongs in the booth and where it should go. A simple visual layout can prevent expensive last-minute display mistakes. When customers can see their booth before they build it, they can make better decisions before the event becomes a live-action rearranging competition.
Step 3: Build A Before-During-After System
The strongest planner should guide the seller through three stages: before the event, during setup and selling, and after the event. Before the event, include inventory, packing, layout, signage, pricing, and transportation planning, while the event-day section can cover setup, customer experience, payment readiness, and quick notes. After the event, include sales tracking, observations, lessons learned, and ideas for the next market.
This structure turns your product into a complete system instead of a collection of unrelated worksheets. It also creates more opportunities for useful pages without simply padding the workbook with decorative filler. Every page should help the seller make a decision, remember something important, or improve the next event.
Step 4: Turn The Planner Into A Product Ladder
Start with a $7 Craft Fair Booth Starter Kit containing a layout sheet, packing checklist, setup checklist, and inventory worksheet. Move to a $17 expanded planner with display planning, signage planning, product placement, pricing prompts, and event review pages, then create a $27 workbook containing a complete ve
“`html id=”q7n4kx”
3 Ways to Stand Out From The Thundering Herd!
Way 1: Make The Planner Visual
Most craft fair vendors are visual people because they’re already creating things customers can see, touch, wear, smell, or admire. Your planner should respect that by giving sellers visual tools instead of pages and pages of tiny text. A booth layout grid, product placement map, display-height planner, and simple visual merchandising checklist can make your product much easier to use.
Include spaces where sellers can sketch their table, mark product zones, identify their best-seller area, and plan where signs will go. You could even provide several sample layouts showing different approaches for a single table, a corner booth, or a booth with multiple tables. When the customer can see the strategy instead of merely reading about it, your planner immediately becomes more practical.
Way 2: Design Around The Customer’s Shopping Journey
A clever booth planner shouldn’t only ask, “Where should I put my products?” It should also ask, “What will a shopper see first, where will they look next, and what will make them stop?” This shifts the seller’s thinking from simply displaying inventory to creating an easier shopping experience.
Help makers identify their attention-grabbing products, easy-to-understand price points, complementary products, giftable items, and checkout area. You could include a simple shopper-flow worksheet that lets sellers map how someone enters the booth, notices the main display, browses products, asks questions, and completes a purchase. That’s a surprisingly powerful little thingee for a six-foot table.
Way 3: Add A “Small Booth, Big Impact” Strategy Section
Make limited space the hero of your product rather than treating it like a disadvantage. Teach sellers to prioritize products, use vertical space, group related items, create height, keep important prices visible, and avoid overcrowding the table. The goal isn’t to display everything because everything doesn’t need to shout at the shopper simultaneously.
You could create a dedicated worksheet called “If I Only Had One Table,” where the vendor chooses which products absolutely deserve display space. Another worksheet could help them identify which products can remain in backup storage and which items can be brought out when a customer asks. This makes the planner feel highly targeted, and targeted products often feel much more valuable than generic business checklists.
3 Nifty Ways to Find Customers
Way 1: Give Away A Mini Booth Planner
Create a free one-page booth layout planner or craft fair packing checklist that solves one immediate problem. Your freebie might help a vendor sketch a six-foot table, remember essential supplies, or complete a final booth-readiness check. Keep it genuinely useful because a freebie that feels like junk mail wearing a PDF costume won’t build much trust.
Use that free resource to introduce your larger paid planner. Your follow-up content can explain how to improve product placement, create stronger displays, prepare inventory, and evaluate an event afterward. The free tool proves that you understand the vendor’s problem, while the paid product provides the complete system.
Way 2: Create Content Around First-Time Craft Fair Problems
First-time vendors have an enormous number of questions, which gives you an enormous number of content opportunities. You can create helpful posts about what to bring, how much inventory to prepare, how to arrange a table, where to put prices, what signs to create, and how to avoid common booth mistakes. Every question becomes a possible piece of useful content and every useful piece of content can point naturally toward your planner.
You don’t have to position yourself as the person with all the secret craft-fair answers either. Share simple, practical planning ideas that help makers think through their own situations. That friendly approach can make your brand feel like the helpful friend who has already remembered the extension cord instead of the business guru standing on a stage shouting about seven-figure booth domination.
Way 3: Build Seasonal Vendor Packs
Craft fairs change throughout the year, which creates an excellent opportunity for seasonal products. A spring market planner could focus on fresh displays and Mother’s Day products, while a summer festival pack could address outdoor setups, heat, weather, and larger crowds. Fall and holiday market packs could focus on gift displays, seasonal inventory, bundles, packaging, signage, and higher-volume shopping periods.
These seasonal products can become add-ons for people who already own your main planner. A customer who bought your basic booth planner may happily purchase a holiday market expansion because the seasonal version solves a different problem. That’s a Good Thing because you’re creating repeat-purchase opportunities without having to reinvent your entire product from scratch.
3 Takeaways You Won’t Find Elsewhere!
Takeaway 1: Less Can Actually Sell More
A small booth does not automatically need more products to look successful. In many cases, a carefully selected collection can make it easier for shoppers to understand what the business sells and where they should look. Your planner can help vendors identify the products that deserve the best positions and reduce the temptation to cover every square inch.
Create a “Must Display / Nice To Display / Backup Inventory” worksheet to help sellers make those decisions. This simple framework can be especially helpful for makers who create many variations of similar products. Sometimes the smartest booth isn’t the one with the most stuff; it’s the one where shoppers can actually see the good stuff.
Takeaway 2: Your Display Should Tell A Story
A strong booth can communicate what the brand is about before the seller says a single word. Product groupings, colors, signs, packaging, display materials, and featured products can work together to create a recognizable visual story. Your planner can encourage makers to define the feeling they want shoppers to experience when they approach the booth.
Add a “Booth Brand Story” worksheet with prompts such as “What should shoppers notice first?”, “What three words describe my brand?”, and “Which product best represents my business?” This turns booth planning into a branding exercise without requiring the seller to become a professional art director. The result can be a booth that feels intentional instead of assembled from whatever happened to fit in the vehicle.
Takeaway 3: Every Craft Fair Can Teach You Something
One of the most valuable parts of your planner can happen after the event. Sales numbers tell only part of the story, so encourage sellers to record which products received attention, which questions shoppers asked, what displays attracted people, and what products frequently ran out. Those observations can become valuable information for the next event.
Create a “What I’ll Change Next Time” section where sellers record three things that worked, three things that didn’t, and three things they want to test. Over time, the planner becomes a business-learning tool rather than a simple event checklist. That’s a Good Thing because your customer isn’t merely preparing for craft fairs anymore; they’re getting better at them.
3 Common Mistakes to Avoid
Mistake 1: Trying To Display Everything
Makers naturally want to show off everything they’ve created because they’ve worked hard on it. Unfortunately, a shopper confronted with an avalanche of products may not know where to begin, especially when items are small, similar, or presented at the same visual level. Help sellers understand that a curated display can be easier to shop than a completely full table.
Include a product-prioritization worksheet that asks sellers to identify best sellers, new products, seasonal products, premium products, and impulse items. Then encourage them to assign each category a specific display zone. This makes the booth more intentional and helps the seller resist the urge to bring the entire inventory universe to one tiny table.
Mistake 2: Forgetting The Practical Stuff
Beautiful displays don’t help much if the vendor forgets price tags, bags, payment equipment, chargers, tape, scissors, extension cords, or other essential supplies. Your planner should give practical preparation as much attention as visual presentation. A gorgeous booth with no way to accept payment is not exactly the business success story we’re trying to write.
Create separate checklists for inventory, displays, sales equipment, technology, personal supplies, and emergency supplies. This makes the list easier to scan and gives sellers a better chance of catching important omissions before leaving home. You could also include a “Pack The Night Before” checklist because frantic morning packing has a special talent for hiding important thingees.
Mistake 3: Never Reviewing The Event
Some vendors pack up after the event, count their money, and immediately move on to the next thing. That means they may repeat the same display mistakes, bring too much of a slow-moving product, or forget which items customers repeatedly asked about. Your planner can help turn every market into useful business research.
Include a short event-review page that captures sales, customer feedback, inventory shortages, popular products, display observations, and improvements for next time. Make it quick enough that sellers will actually complete it after a long day. A two-minute review that gets used is far more valuable than a magnificent twelve-page analysis that sits untouched in a binder.
Scaling Your Results
Once your core booth planner is established, you can create specialized versions for different types of makers. Jewelry vendors, candle makers, soap makers, clothing sellers, artists, pottery makers, crochet businesses, woodworkers, and paper crafters all face slightly different display challenges. Each niche can become a focused edition while still using the same underlying planning framework.
You can also create products based on the vendor’s experience level. A “First Craft Fair Planner” could help beginners prepare their first event, while an “Experienced Vendor Booth Optimization Planner” could focus on merchandising, customer flow, inventory strategy, sales analysis, and testing different layouts. This gives you multiple entry points into the same audience instead of relying on one product to do everything.
Another strong expansion is a complete craft fair business library. You could include booth planners, inventory trackers, sales sheets, pricing worksheets, vendor application trackers, event comparison pages, customer follow-up planners, seasonal market planners, and post-event review systems. A collection containing 40 well-designed craft fair and handmade-business products could potentially generate an additional $700 to $2,200 per month through bundles, repeat customers, memberships, and complementary offers, although actual results will vary based on traffic, pricing, product quality, audience fit, and marketing.
You can even build a membership around recurring vendor preparation. Each month could bring a new booth challenge, seasonal display worksheet, event checklist, inventory planner, or merchandising exercise. The more your resources help vendors prepare for real events, the more naturally your business can move from selling isolated printables toward providing an ongoing planning ecosystem.
Your Next Steps
Start by creating the simplest version of your product: a booth layout planner, inventory sheet, packing checklist, setup checklist, and event-review page. Test the pages yourself by imagining that you’re preparing for a real craft fair with one table and a car full of products. If you can’t immediately understand what each page is helping you decide, simplify it before adding more thingees.
Next, create your $7 starter offer and make the transformation obvious. Instead of saying that customers receive five printable worksheets, explain that they receive a simple system for planning their booth, packing their supplies, organizing inventory, and arriving ready to sell. Then use customer questions and feedback to decide whether the next product should be an expanded planner, a niche-specific edition, a seasonal pack, or a larger vendor binder.
Finally, start building content around the small-space problem. Show sellers how to make one table feel more organized, how to create visual height, how to choose products for prime display space, and how to avoid booth clutter. When your audience begins associating your brand with “making a small craft booth work better,” you’ve created a recognizable niche instead of simply adding another generic printable to the thundering herd.
Final Thoughts
A craft fair booth may only occupy a small physical space, but it represents a much bigger opportunity for a handmade business. Every product placement, sign, display height, price tag, and customer pathway can influence how easily shoppers understand and interact with the brand. A thoughtful booth planner helps sellers make those decisions before they are standing behind the table surrounded by boxes and wondering why they brought six baskets but forgot the scissors.
The product ladder can also grow beautifully from a simple $7 starter planner into a $17 expanded system, a $27 workbook, a $47 vendor binder, and eventually a $77 comprehensive craft fair planning library. Add seasonal editions, niche-specific booth planners, inventory tools, sales trackers, and event-review resources, and you have multiple ways to serve the same customer again. You don’t need to build the whole empire today because one useful planner can become the first brick.
Most importantly, remember what you’re really helping makers accomplish. You’re helping them take a limited space, make thoughtful choices, create a better shopping experience, and walk into their next craft fair feeling prepared instead of frazzled. That’s a transformation people can understand immediately, and when your printable delivers that kind of practical value, you’ve got something worth building on.
That’s it. That’s your beginning! Choose one type of craft fair seller, solve one small-space booth problem, create one genuinely useful planner, and let the next product grow from what customers actually need. If you were creating your first craft fair booth planning printable tomorrow morning, what type of maker would you design it for, and what would you help that seller improve first: the layout, the product display, the packing process, or the customer shopping experience?
Enjoy!