Introduction
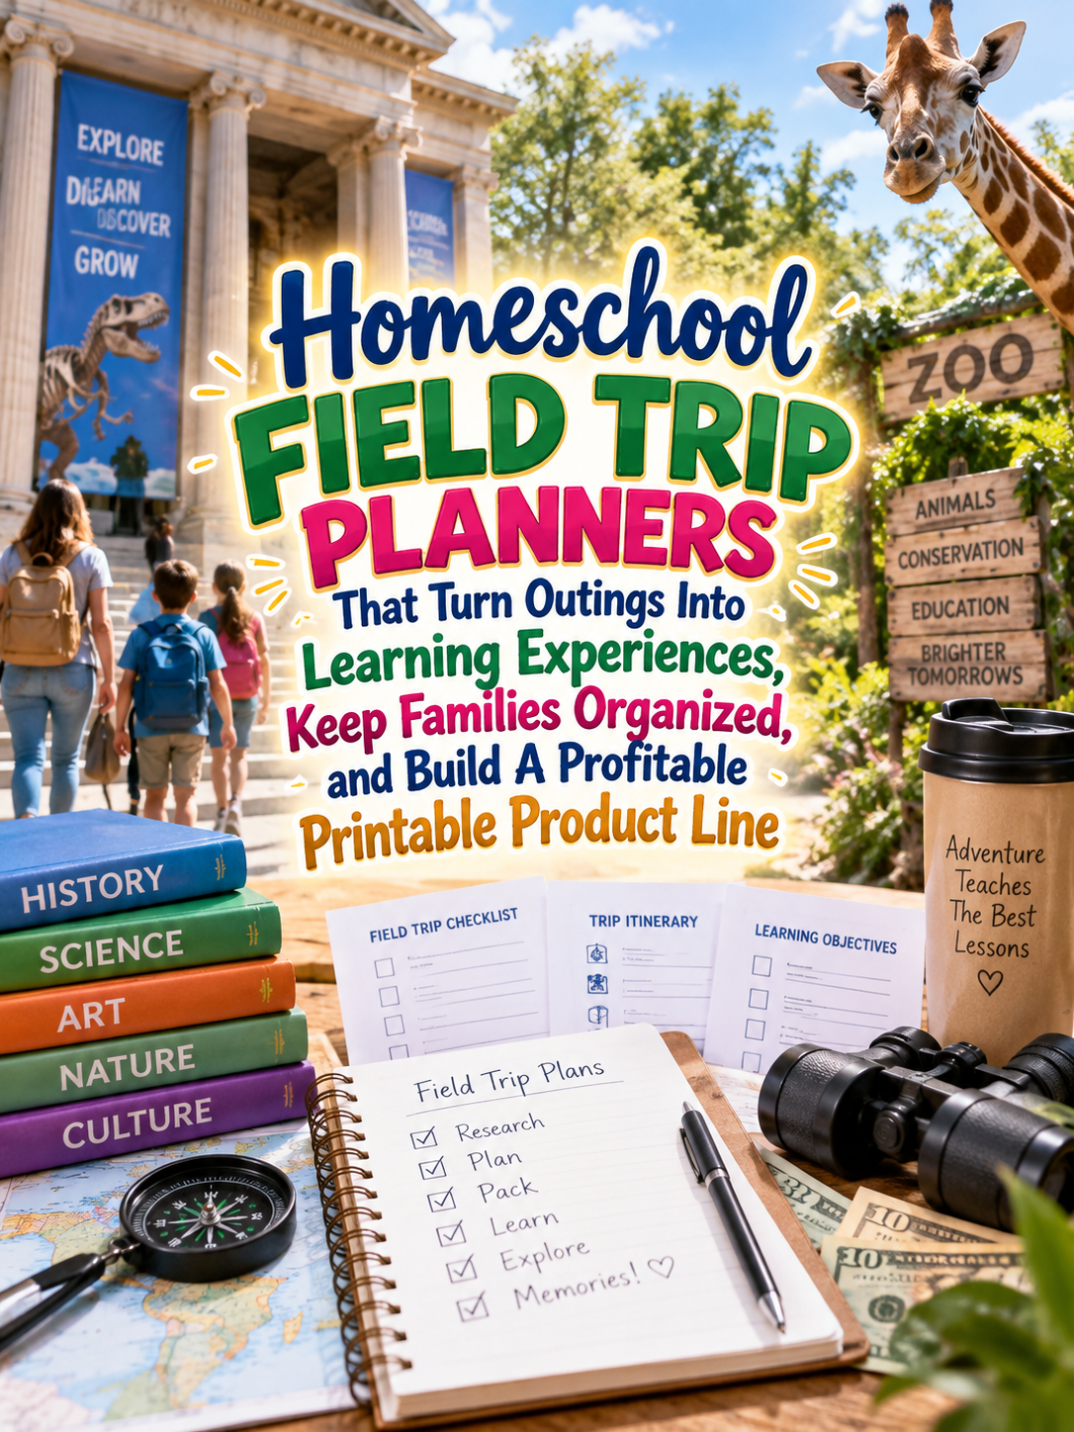
Field trips are one of those wonderful homeschool moments when the classroom suddenly grows wheels, doors, sidewalks, museum halls, hiking trails, farms, zoos, and pretty much anywhere else curiosity decides to wander. A child can learn about history while standing inside an old building, study biology while watching animals, or discover geography while navigating a new place with Mom or Dad. The trick is turning that exciting outing into something more than, “Look, honey, there’s a dinosaur!”
That is where a homeschool field trip planner can become incredibly useful. Families can use one simple printable system to plan the destination, connect the outing to learning goals, prepare questions, organize supplies, record observations, and reflect on what happened afterward. Suddenly, the field trip isn’t just another activity on the calendar because it becomes a reusable learning experience that can be remembered, reviewed, and even turned into future lessons.
And here’s the sneaky-good part for digital product creators: parents already understand the value of field trips, but many don’t want to create the organizational system themselves. They want something that makes planning easier without turning a fun outing into a paperwork convention. That’s a Good Thing because you’re not really selling a few printable pages; you’re selling a calmer way to turn an ordinary outing into meaningful homeschool learning.
Quick Answer
A homeschool field trip planner is a printable or digital planning system that helps homeschooling families prepare for educational outings, connect trips to subjects, organize activities, capture observations, and review what children learned afterward. You can create individual field trip planning pages, themed trip packs, subject-specific planners, seasonal collections, or complete field trip organizer systems. The best products make the outing easier for the parent while making the learning experience more engaging for the child.
A simple $7 starter product could include a field trip planning sheet, packing checklist, observation page, question prompts, and reflection page. A $17 version could add subject connections, scavenger hunts, note-taking pages, and several trip templates, while a $27 workbook could provide a complete collection of field trip activities and reflection exercises. At $47, you could create a reusable family field trip binder system, and a $77 product could become a comprehensive homeschool field trip library containing themed planning packs, activity sheets, research pages, memory pages, and bonus resources.
The key is to build around the experience rather than the destination alone. A planner for “museum trips” is useful, but a system that helps children ask questions, observe details, make predictions, collect information, and reflect afterward is much more valuable. That’s it. That’s your beginning!
Why This Niche Works
Homeschool families often have tremendous flexibility when it comes to learning outside the home, but flexibility can also create a tiny organizational monster. One week the family is planning a museum visit, the next week they’re thinking about a nature walk, and suddenly everyone is searching for snacks, notebooks, admission information, pencils, and the missing water bottle. A field trip planner gives parents one place to organize the experience before the family heads out the door.
Field trips also naturally connect multiple subjects, which gives your product plenty of room to become more valuable. A visit to a farm can involve science, writing, math, geography, nutrition, art, and even business concepts, while a historical site can inspire research, vocabulary, reading, writing, and timeline activities. Your planner can help parents see those connections without requiring them to spend their evening building a curriculum from scratch.
Another reason this niche works is that field trips create memories, and families love keeping meaningful records of those memories. A good planner can include space for children to draw what they saw, write their favorite discovery, record interesting facts, answer questions, and add a photograph later. Now your printable has quietly transformed from a planning tool into a little educational scrapbook, and that’s always a Good Thing.
What You Can Put Inside A Homeschool Field Trip Planner
1. Field Trip Planning Pages
Start with the practical information parents need before leaving home. Include the destination, date, location, transportation plan, estimated travel time, opening hours, costs, contact information, and the main reason for the trip. You can also add a simple section for learning objectives so parents can decide what they want children to notice or understand.
Keep this page simple because parents are not looking for a twelve-page government application before visiting the aquarium. A clean planning sheet can give them enough structure to feel prepared while still leaving room for the outing to feel spontaneous. You could even include a small “Things We Want To Discover” section because curiosity is often the best field-trip teacher in the room.
2. Field Trip Packing Checklist
A packing checklist can save parents from discovering halfway through the trip that the child has a notebook but nobody brought a pencil. Include common items such as water, snacks, notebooks, pencils, camera or phone, identification, tickets, comfortable clothing, weather-appropriate supplies, and any destination-specific materials. You can make the checklist editable or leave several blank lines so families can customize it for different outings.
You could also create separate versions for museum trips, outdoor adventures, beach trips, farm visits, historical locations, and science centers. This gives you multiple related products from one basic idea without making every product feel identical. The thundering herd may be busy making generic checklists, but your niche-specific versions can feel much more useful.
3. Learning Goal Planner
Give parents a place to decide what the child should learn, practice, investigate, or experience during the outing. The learning goal could be as simple as identifying three types of animals, understanding how a historical building was used, observing plant adaptations, or practicing descriptive writing. You can include subject labels such as science, history, geography, math, reading, writing, art, and life skills.
The goal isn’t to force every field trip into six academic subjects because that can make a perfectly lovely Saturday outing feel like a committee meeting. Instead, encourage parents to choose one or two meaningful learning connections. That keeps the experience focused while still allowing children to follow interesting discoveries along the way.
4. Field Trip Observation Pages
Observation pages can turn passive looking into active learning. Give children prompts such as “What did you notice first?”, “What surprised you?”, “What changed as you moved through the location?”, and “What question do you still have?” These questions encourage children to slow down and actually notice what is happening around them.
You can create different observation pages for different ages, too. Younger children might draw pictures and circle simple choices, while older students might record measurements, write detailed observations, compare information, or identify evidence supporting an idea. That age flexibility can make your product much more attractive to families teaching multiple children.
5. Field Trip Scavenger Hunts
Scavenger hunts can turn a field trip into an active learning adventure. Instead of simply telling children to look around, give them specific things to find, compare, identify, count, describe, or photograph. A museum scavenger hunt might ask children to locate an object from a particular time period, while a nature trip could ask them to find different leaf shapes, animal tracks, textures, or signs of seasonal change.
You can create themed scavenger hunts as standalone products or bundle them into your larger field trip planner. You could even make versions for history, science, art, animals, transportation, architecture, and local geography. Suddenly one simple product idea has started breeding thingees, and in this case, that’s a Good Thing.
6. Field Trip Question Cards
Question prompts can help parents guide conversations without having to invent questions while walking through a crowded attraction. Include prompts that encourage prediction, comparison, observation, reasoning, explanation, and curiosity. Questions such as “Why do you think this was designed this way?” or “What would happen if this changed?” can turn a simple observation into a deeper conversation.
These questions can also become a separate mini-product because parents may want something portable. You could create printable cards that families cut apart and keep in a small envelope or binder pocket. That gives your customer another practical feature while giving you another potential product in the same niche.
7. Post-Trip Reflection Pages
The learning doesn’t have to stop when the family gets back home. A reflection page can ask children to record their favorite discovery, explain something they learned, describe something surprising, and identify a question they would like to investigate further. This creates a natural bridge between the field trip and future homeschool lessons.
You can also include prompts for drawing, storytelling, short essays, vocabulary, or research depending on the child’s age. Older students could write a field trip report, while younger children could complete a simple “I Saw, I Learned, I Wonder” page. That makes the planner useful before, during, and after the outing instead of becoming another printable that gets forgotten in a drawer.
8. Field Trip Memory Pages
Memory pages give families a place to preserve the personal side of the experience. Include space for a photo, favorite moment, funniest moment, favorite fact, new vocabulary, and a short description of what made the trip special. These pages can eventually become a family field trip album that children can look through years later.
This is also where your product can develop a little emotional magic. Parents aren’t only organizing educational activities; they’re creating childhood memories while homeschooling. When your planner helps them capture those memories alongside the learning, the product suddenly has value beyond simple organization.
Tools You’ll Need
Canva can help you design attractive planner pages, checklists, worksheets, scavenger hunts, and printable covers. Keep the pages clean and readable because homeschool parents need something they can actually print and use, not a decorative maze of seventeen fonts.
Google Docs is useful for drafting questions, activity instructions, reflection prompts, and product descriptions before you move everything into your final design. It can also help you organize the educational content while you’re building larger workbook collections.
AWeber can help you build an email audience around homeschool planning, field trips, educational activities, and printable resources. A free field trip checklist or mini scavenger hunt can become a useful lead magnet that introduces parents to your paid products.
GetResponse can support email campaigns that nurture your audience with field trip ideas, seasonal activity suggestions, printable freebies, and product offers. Remember that five good messages beats fifty generic ones every single time because relevance is what gets attention.
Gumroad can be used to sell downloadable field trip planners, activity packs, themed bundles, and other digital products. This works especially well when your product is delivered immediately and the customer can print it whenever they need it.
Teachable could become useful if you eventually expand beyond printables into short homeschool planning workshops, field-trip preparation classes, or educational activity libraries. A printable can be your doorway into a larger ecosystem of helpful digital resources.
Amazon homeschool field trip planner research can give you ideas about the kinds of homeschool planning products and educational resources shoppers are already browsing. Look for recurring themes in titles, reviews, formats, and customer complaints because those clues can help you identify opportunities for a more useful product.
Your 5-Step Action Plan
Step 1: Choose Your Homeschool Family
Start by deciding exactly who your planner is designed to help. You could target families with young children, families with elementary students, parents teaching multiple ages, relaxed homeschoolers, nature-loving families, roadschoolers, or families who simply want to make occasional outings more educational. The more clearly you understand your customer, the easier it becomes to decide what belongs inside the planner.
For example, a field trip planner for preschool and kindergarten families might rely heavily on pictures, simple questions, coloring, and drawing. A planner for middle-school students could include research questions, note-taking sections, vocabulary, evidence collection, and written reflection. Don’t try to make one giant product for every possible homeschooler on planet Earth because that’s how the thundering herd gets invited into your living room.
Step 2: Choose The Core Field Trip Experience
Decide whether your first product will be a general field trip planner or a themed planner. A general version is easier to create and can appeal to a wider audience, while themed versions can solve more specific problems and make excellent follow-up products. You might begin with a general planner and later create museum, zoo, aquarium, nature, historical-site, farm, science-center, and art-gallery editions.
Your goal is to create one strong starting product rather than twenty half-finished ones. Choose the field-trip experience that feels easiest for you to understand and explain. A focused first product gives you something you can actually launch, test, improve, and expand.
Step 3: Build The Before-During-After System
The strongest planner structure is simple: prepare before the trip, engage during the trip, and reflect after the trip. This three-stage approach gives your product a natural flow and helps parents understand exactly how to use every page. It also makes your planner feel like a complete learning system rather than a random stack of worksheets.
Before the trip, include planning, packing, goals, and questions. During the trip, include observations, scavenger hunts, notes, sketches, and discoveries, while after the trip, include reflection, writing, research ideas, and memory pages. That structure is easy for parents to understand and easy for you to expand into future products.
Step 4: Turn One Planner Into A Product Ladder
Start with a $7 field trip starter pack containing the essential planning and reflection pages. Move to a $17 expanded planner with multiple age levels, scavenger hunts, question cards, and themed activities, then create a $27 workbook with a larger collection of field trip learning activities. A $47 binder system could organize an entire family field trip library, while a $77 comprehensive collection could include destination-specific packs, seasonal challenges, subject connections, memory pages, and bonus resources.
This product ladder lets customers start small and move upward when they discover that your system actually helps them. You don’t have to create the $77 monster on day one, and frankly, that’s probably a Good Thing. Build one useful product first, listen to customer feedback, then let that feedback tell you which thingees deserve to become your next offer.
Step 5: Market The Learning Experience
When you market your planner, don’t simply say that it contains thirty printable pages. Tell parents what changes when they use it because customers usually care more about the outcome than the page count. Explain that the planner can help them prepare for outings, give children meaningful questions to answer, connect trips to homeschool subjects, and preserve what their children discovered.
Create content around problems parents recognize, such as “How to Make a Museum Trip More Educational,” “What to Ask Kids During a Nature Walk,” or “How to Turn a Zoo Visit Into A Homeschool Lesson.” These topics naturally lead toward your product without making every piece of content sound like a sales pitch wearing a fake mustache. Trust me, you’ll thank me later.
What Comes Next
Once you’ve figured out all of the above, the next step is turning your homeschool field trip planner into a flexible learning system that helps families prepare with less stress, keep children engaged during outings, and turn discoveries into meaningful follow-up activities. The opportunity becomes much bigger when you stop thinking of the product as a collection of worksheets and start thinking of it as a repeatable experience. That’s where a simple printable can become the foundation for an entire product line.
We’ll look at three ways to make your homeschool field trip planners stand out from the thundering herd, three nifty ways to find customers, three takeaways that can make your products more useful, three common mistakes to avoid, and practical ways to scale the idea into a larger digital product business. We’ll also turn those ideas into clear next steps so you aren’t left staring at Canva wondering which rectangle should be your next thingee.
3 Ways to Stand Out From The Thundering Herd!
Way 1: Design For Different Ages
One of the easiest ways to make your homeschool field trip planner more valuable is to recognize that a five-year-old and a fourteen-year-old probably shouldn’t be answering the exact same questions. Younger children may need drawing prompts, simple observations, picture-based activities, and short sentences, while older students can handle research questions, comparisons, evidence gathering, and longer written reflections. When parents can use your product with more than one child by simply choosing the appropriate level, your planner becomes much more useful to the whole family.
You could create three levels such as Early Learners, Elementary, and Middle & High School, with the same basic field trip structure but different activities. This also gives you a clever product-expansion opportunity because one core planner can become several age-specific editions. The thundering herd may be selling one-size-fits-all worksheets, but you’re creating something that understands that children don’t all learn at the same speed, and that’s a Good Thing.
Way 2: Turn Every Trip Into A Mini Adventure
Children usually don’t wake up excited because someone announced that they have completed another educational worksheet. They are much more likely to get excited when the activity feels like a mission, investigation, treasure hunt, challenge, or discovery adventure. Add elements such as “Junior Detective,” “Nature Explorer,” “History Hunter,” “Science Investigator,” or “Museum Mystery” themes to make ordinary observation feel more playful.
You can build simple missions into your planner, such as finding three unusual objects, identifying something older than the child, discovering evidence of how people lived in the past, or finding something that raises a new question. These activities encourage children to interact with their surroundings rather than simply filling in blanks. When the learning feels like an adventure, parents get a useful educational tool and children get a reason to say, “Can we do another one?”
Way 3: Create A Field Trip Passport
A field trip passport can become one of the most memorable features in your product line. Give children a page for each outing where they can record the destination, date, favorite discovery, subject connection, and a small drawing or stamp. Families can continue adding pages throughout the school year, turning separate outings into one growing record of their learning adventures.
You could create printable badges or achievement certificates for completing different types of trips, such as Nature Explorer, History Detective, Science Discoverer, Art Observer, or Geography Adventurer. Children can work toward collecting different badges without the experience becoming overly competitive. And parents may love the fact that the passport creates a visible record of how much learning happened outside the traditional homeschool workspace.
3 Nifty Ways to Find Customers
Way 1: Create Free Field Trip Resources
A free one-page field trip checklist or mini scavenger hunt can introduce homeschool parents to your style before asking them to buy anything. You could offer a free “10 Questions To Ask On Any Field Trip” printable, a simple packing checklist, or a one-page field trip reflection sheet. The free resource should solve one small problem extremely well while naturally showing customers that your paid planner solves the bigger problem.
Once someone downloads your freebie, you can introduce related products through helpful email content. One message might explain how to prepare children before a museum visit, another might share a simple post-trip reflection activity, and another could introduce your complete planner. Remember, five good messages beats fifty generic ones every single time because a parent who feels understood is much more likely to pay attention.
Way 2: Build Seasonal Field Trip Collections
Seasonal collections give you a natural reason to create new products throughout the year. A spring collection might focus on gardens, farms, baby animals, weather, and outdoor science, while a fall collection could include farms, historical sites, nature walks, leaves, harvest activities, and local community experiences. Winter and summer can have their own collections based on indoor destinations, travel, science, museums, beaches, parks, and family adventures.
These collections don’t have to replace your main planner because they can work as companion products. Someone who purchases your core planner might later buy a seasonal activity pack because it gives them fresh ideas without requiring them to learn a completely new system. That creates repeat-customer potential without constantly having to find an entirely new audience.
Way 3: Show The Product In Action
Field trip planners are visual products, which means your marketing should show parents what using the planner actually looks like. Share mockups of a child completing an observation page, a scavenger hunt being used at a museum, or a completed reflection page after a family outing. You want the parent to picture the product sitting in the backpack, riding in the car, and eventually becoming part of the family’s homeschool memories.
You can also create short educational posts showing how one ordinary destination can connect to several subjects. For example, a trip to a local farm could inspire science observations, measurement activities, descriptive writing, geography, nutrition discussions, and a little business math if the farm sells products. You’re demonstrating the value of your planner before the customer even opens the sales page, and that is a powerful way to market without shouting, “BUY MY THINGEE!”
3 Takeaways You Won’t Find Elsewhere!
Takeaway 1: The Destination Is Not The Product
The destination might be the exciting part of the field trip, but the learning system is what makes your planner valuable. A museum, zoo, farm, park, aquarium, or historical site can all become learning environments when children are encouraged to observe, question, connect, and reflect. Your product should therefore focus on helping families get more learning value from whatever destination they choose.
This also protects your product from becoming outdated because you aren’t dependent on one specific attraction. Instead, you’re creating a flexible framework that can travel anywhere the family travels. That means your planner can work for a local outing on Tuesday and a major family road trip six months later.
Takeaway 2: Curiosity Can Be More Powerful Than A Worksheet
A great field trip planner doesn’t need to tell children everything they should know before they arrive. Sometimes the better strategy is to give them questions that encourage them to notice something for themselves. Asking “What do you think this was used for?” can create a much more memorable learning moment than giving the child a paragraph of information to memorize.
Build curiosity into your pages with prompts that encourage children to predict, compare, wonder, investigate, and explain. This allows the planner to support different destinations without becoming a giant encyclopedia. The goal isn’t to fill every available inch of paper because sometimes leaving a little space for curiosity is the smartest thing you can do.
Takeaway 3: Make The Planner Reusable
A reusable system can be much more valuable than a planner designed to be used once. Give families pages they can print repeatedly, such as field trip planning sheets, packing lists, observation forms, reflection pages, and passport pages. When customers realize they can use the same core product throughout an entire homeschool year, the perceived value increases significantly.
You can also encourage families to build a field trip binder where completed pages become a record of their homeschool journey. Add divider pages for science, history, nature, art, geography, and community experiences, and you’ve suddenly created a system that grows with the family. That’s a Good Thing because customers aren’t buying one afternoon of organization; they’re building a reusable learning resource.
3 Common Mistakes to Avoid
Mistake 1: Making Every Trip Feel Like School At A Desk
One of the biggest mistakes is packing the planner with so many academic requirements that the field trip stops feeling like an adventure. Children need opportunities to explore, talk, notice, move, ask questions, and simply enjoy being somewhere different. If every five minutes requires writing three sentences, the child may begin looking longingly at the exit before the educational magic has even started.
Use short prompts and flexible activities instead of requiring every page to be completed. Parents should be able to skip a section when it doesn’t fit the outing and return to another section later. A planner that supports the experience instead of controlling it will probably get used more often, and that is exactly what you want.
Mistake 2: Creating One Product For Every Possible Age
Trying to serve preschoolers, elementary students, teenagers, and parents with exactly the same pages can make the product confusing. Younger children may become frustrated by writing-heavy activities, while older students may find picture-based pages far too easy. Instead of forcing everyone into one format, create a clear age-level structure or offer separate editions.
This approach also creates a natural product ladder because families can purchase the version that fits their children. You could eventually offer a family bundle containing multiple age levels, which gives customers a practical reason to upgrade. You’re not simply adding more pages; you’re adding relevance, and relevance is worth more than page count.
Mistake 3: Forgetting The Parent’s Experience
It is easy to focus so heavily on children’s activities that you forget who is actually purchasing the planner. Parents need practical help with preparation, transportation, schedules, costs, supplies, emergency information, learning objectives, and follow-up activities. If your product only looks fun for children but doesn’t make the parent’s job easier, it may not become the repeat-use tool you intended.
Create pages that reduce mental load before and after the outing. Include simple checklists, planning prompts, reusable forms, and clear instructions that don’t require the parent to study a manual first. The best planner quietly does some of the thinking for the parent, and parents generally appreciate anything that does that without demanding a snack in return.
Scaling Your Results
Once your first homeschool field trip planner is working, you can expand horizontally into related destinations and vertically into more comprehensive systems. You might create museum planners, zoo planners, aquarium planners, nature exploration packs, historical-site planners, farm visit packs, science-center activity books, and road-trip learning journals. Each product can address a specific field-trip situation while still connecting back to your core planning system.
You can also build themed bundles around subjects rather than destinations. A “History Field Trip Bundle” could include historical-site activities, timeline pages, artifact observation sheets, interview questions, and history reflection pages, while a “Science Field Trip Bundle” could include experiments, observation charts, measurement activities, prediction prompts, and investigation pages. This lets you serve parents who plan their homeschool around subjects while still using the same fundamental product architecture.
Another possibility is a growing field trip membership or resource library. Customers could receive new seasonal field trip packs, destination-independent activities, scavenger hunts, passport pages, and educational challenges each month. A collection containing 40 well-designed homeschool field trip products could potentially generate an additional $700 to $2,200 per month through bundles, repeat customers, memberships, and complementary offers, although actual results will vary based on traffic, pricing, product quality, audience fit, and marketing.
Your Next Steps
Your first move should be choosing one specific customer and one specific field-trip problem. Don’t start by trying to create the ultimate homeschool field trip encyclopedia because that is a very efficient way to spend three weeks choosing fonts. Instead, decide whether you’re helping families plan museum visits, nature outings, historical adventures, general educational trips, or something else that feels focused and useful.
Next, sketch your product around the before-during-after journey. Include enough preparation to make the outing easier, enough activities to keep children engaged, and enough reflection to extend the learning after everyone gets home. Then create your $7 starter product before worrying about the $77 version because your first goal is to launch something useful, not build the Taj Mahal of printable field-trip worksheets.
After launching, pay attention to what customers ask for. If people want more age levels, create age-level editions, and if they want more destination-specific activities, create themed packs, while if they want organization, create the binder system. Customer questions can become your product roadmap, which is a much smarter strategy than sitting at your desk trying to guess what the internet might possibly want next.
Final Thoughts
Homeschool field trips already contain something incredibly valuable: real-world experiences that children can see, touch, question, discuss, and remember. Your planner simply gives those experiences a little structure so families can capture more of the learning without squeezing the joy out of the adventure. When you combine planning, curiosity, observation, reflection, and memory keeping, you’re creating something that can become part homeschool tool, part family keepsake, and part reusable learning system.
The business opportunity becomes even more interesting when you think beyond one planner. A $7 starter pack can lead to a $17 expanded version, a $27 workbook, a $47 family binder system, and eventually a $77 comprehensive field trip library, while themed packs and seasonal collections create additional reasons for customers to return. You don’t need a thundering herd of customers to begin because a small audience that genuinely loves a useful product can give you valuable feedback, testimonials, ideas, and momentum.
Most importantly, remember that you’re not selling paper. You’re helping a parent turn “We’re going to the museum tomorrow” into an experience where a child observes something fascinating, asks a question, makes a connection, and comes home excited to tell somebody about it. That’s the kind of transformation that makes a printable worth buying, using, printing again, and recommending to another homeschool family.
That’s it. That’s your beginning! Start with one field trip, one audience, and one useful planner, then let your product line grow from there instead of trying to build everything at once. If you were creating your first homeschool field trip planner tomorrow morning, which type of outing would you design it for, and what would you want the child to discover, question, or remember when the trip was over?
Enjoy!