Introduction
Macramé looks wonderfully relaxing when someone else is doing it, but once you have cords, patterns, measurements, knots, colors, beads, and half-finished projects scattered across your workspace, things can get a little more exciting. A creative maker may start one wall hanging, pause it for another idea, buy supplies for a third project, and then discover a mysterious collection of cords that apparently belongs to something important. That’s Not a Good Thing when you’re trying to finish projects, but it creates a very real opportunity for a macramé project planner that brings all those creative thingees back into one organized system.
A macramé project planner can help makers record project ideas, choose patterns, track cords and supplies, note measurements, estimate costs, document progress, and record finished projects. You can make the planner printable, digital, or both, depending on how your audience likes to work. The best part is that you’re not simply selling blank planning pages, because you’re creating a practical companion for people who already love making things with their hands.
This niche also has excellent product-ladder potential because one planner can lead naturally into several related digital products. You could begin with a $7 Macramé Project Planner, expand into a $17 Project Workbook, create a $27 collection of specialized planning sheets, build a $47 Complete Macramé Maker Binder, and eventually offer a $77 library of project planners, inventory pages, cost trackers, pattern logs, and business-oriented worksheets. Actual results will vary based on audience fit, product quality, traffic, pricing, and marketing, but the opportunity is there to turn one creative idea into an entire family of useful digital products.
Quick Answer
Macramé project planners are printable or digital organizational tools designed specifically for makers who want to keep track of their knotting projects, materials, patterns, measurements, progress, and finished pieces. Instead of trying to remember which cord thickness belongs to which project or scribbling measurements on the nearest scrap of paper, makers can keep everything connected in one place. That simple organization can make a creative hobby feel much less chaotic without taking away any of the fun.
A useful product ladder could include a $7 starter project planner, a $17 expanded workbook, a $27 bundle containing project planning and supply-tracking sheets, a $47 complete macramé maker binder, and a $77 comprehensive library of planning resources. You can also create specialized products for wall hangings, plant hangers, keychains, home décor, gift projects, market preparation, or handmade-product businesses. The goal is to create useful tools that help makers organize their process rather than promising that a planner will automatically make someone a better maker or guarantee business income.
Why This Niche Works
Macramé makers often work on projects that involve multiple materials and several stages of preparation. A project might require a particular cord type, a certain amount of material, beads or rings, a pattern reference, measurements, color choices, and notes about where the project currently stands. When those details live in different notebooks, screenshots, shopping carts, and mysterious phone photos, finding the right information later can become a creative scavenger hunt.
A project planner gives makers one consistent place to capture those details. They can record the project name, inspiration, pattern source, materials, dimensions, color palette, estimated cost, start date, progress, and completion date. You can even add a section for lessons learned so the maker can remember what worked and what they would change when they create a similar project again, which is always a Good Thing.
The niche also has a strong visual component, which gives you plenty of room to create attractive products. Macramé naturally lends itself to warm, handmade, bohemian, minimalist, natural, and textured design themes, so your planner can look appealing while still being functional. Just remember that beautiful design should support usability, because a gorgeous planner with tiny writing spaces is Not a Good Thing when someone is trying to record measurements with a pencil the size of a breadstick.
Another reason this niche works is that makers can have multiple projects at different stages. Someone might have one project in the planning stage, another waiting for supplies, another currently being knotted, and several completed pieces they want to remember. Your planner can make this project queue visible, which helps the customer understand what they’re working on instead of letting every unfinished project become part of the thundering herd.
What You Can Put Inside a Macramé Project Planner
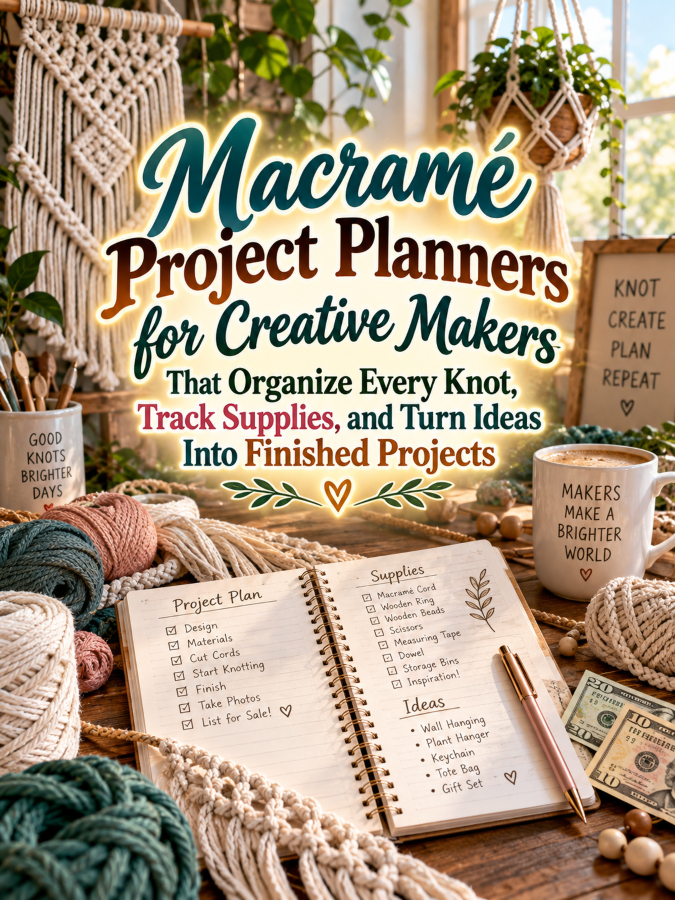
Start with a strong project overview page. Include spaces for the project name, inspiration, finished dimensions, intended use, pattern or tutorial reference, color choices, materials, estimated time, and notes. You can also include a small inspiration area where makers can jot down ideas about texture, shape, fringe, beads, rings, or other decorative details.
Material tracking is another valuable feature. Give makers places to record cord type, cord size, color, quantity, hardware, beads, wooden elements, and other supplies used for each project. If someone wants to recreate a successful project later, having those details already recorded can save them from trying to remember whether they used three-millimeter cord or four-millimeter cord six months ago.
Progress pages can make the planner even more useful. Create simple spaces for project stages such as idea, pattern selected, supplies gathered, started, halfway finished, finishing touches, photographed, and completed. You can also include a project cost page, finished-project gallery, gift-project tracker, custom-order notes, and a “projects I want to try next” list so the planner becomes a central creative command center.
Tools You’ll Need
You don’t need a complicated design setup to create this type of product. Canva can help you design planner pages, covers, trackers, worksheets, checklists, and promotional graphics, while Google Docs can help you organize your written content and develop your planner sections before designing the final pages. Keeping the writing and layout stages separate can make the whole process much easier to manage.
For building an audience, AWeber and GetResponse can help you create an email list for makers interested in organization, project planning, and creative resources. You can sell the finished digital products through Gumroad, while Teachable can become useful later if you decide to add classes, guided projects, or maker-focused educational content.
For niche research, Amazon Macramé Project Planner Research can help you study the language makers use when searching for related products and identify themes that appear repeatedly. Use that research to discover customer needs, common project categories, and potential product gaps rather than copying another seller’s work. You’re looking for clues, not a treasure map with somebody else’s X already marked on it.
Your 5-Step Action Plan
Step 1: Choose Your Macramé Maker
Before designing anything, decide exactly who you want your planner to help. You could create a general planner for hobby makers, but you could also target beginners, experienced makers with large project queues, home décor creators, gift makers, craft-fair sellers, or people who create macramé items for an online shop. Each audience will have slightly different organizational needs, so this decision will influence nearly every page you create.
For example, a beginner may need simple project planning pages, supply checklists, measurement notes, and progress tracking. A maker selling finished pieces may care more about material costs, labor time, pricing notes, inventory, photography, and customer orders. You don’t have to serve everyone with your first product, because a focused planner can give you a much clearer starting point and make future products easier to develop.
Step 2: Build the Core Project Sheet
Create one excellent project sheet before designing an entire workbook. It should give the maker enough space to capture the most important information about one project from idea through completion. Include sections for the project name, purpose, dimensions, materials, colors, pattern reference, dates, notes, and progress.
Think about what the maker would wish they had written down after completing a project. Maybe they loved a particular color combination, discovered that a certain amount of cord was just right, changed the original dimensions, or found a knotting technique they want to remember. Those details can become part of the planner because you’re not only helping someone organize today’s project; you’re helping them build their own personal library of creative knowledge.
Step 3: Add Supply and Cost Tracking
Supplies can become one of the most useful sections in your planner. Give makers a place to record what they already have, what they need to buy, how much they purchased, and which project the supplies are intended for. You can also add simple cost tracking so makers can understand how much material went into a finished piece.
This becomes especially valuable for people who sell their macramé creations. A maker who records materials and time can make more informed pricing decisions instead of simply looking at what another seller charges and hoping the numbers somehow work. You’re not promising a particular profit, but you are giving the customer better information for making their own business decisions, and that’s a Good Thing.
Step 4: Create a Project Queue
Give your customers somewhere to capture all those projects they want to make. A project queue can include the project name, priority, status, required supplies, estimated size, and target completion date. This helps makers see the difference between projects they are actively working on and ideas that are simply waiting patiently in the wings.
You can also add a “Why I Want to Make This” field, which sounds a little sentimental but can be surprisingly useful. A project might be for a gift, a home décor update, a customer order, a craft fair, or simply because the design looks ridiculously fun. When the reason is visible, it can help the maker decide which project deserves attention when the thundering herd of ideas starts charging across the desk.
Step 5: Turn the Planner Into a Product Ladder
Once your core planner is complete, look for logical ways to expand it. A $7 starter planner could contain the essential project sheet, supply checklist, project queue, and progress tracker, while a $17 version could add detailed cost tracking, pattern notes, finished-project records, and multiple project templates. Your $27 offer could bundle several specialized planners for different macramé project types.
Then you can build toward a $47 Complete Macramé Maker Binder with project management, supply inventory, cost tracking, custom-order pages, craft-fair preparation, and finished-project galleries. A $77 library could bring together multiple themed planners, reusable worksheets, project trackers, business planning pages, and seasonal collections. That’s how one useful planner can become a complete product ecosystem instead of a single thingee sitting quietly on your digital shelf.
Once you’ve figured out all of the above, the next step is showing makers why your planner can become the organized creative home for all those projects, supplies, ideas, and finished pieces.
3 Ways to Stand Out From The Thundering Herd!
Way 1: Make the Project Queue a Star Feature
One of the most useful features you can add to a macramé project planner is a dedicated project queue. Makers often have far more ideas than available hands, hours, and wall space, so giving them a place to capture future projects can make your planner immediately useful. Let them record the project name, priority, materials needed, pattern source, estimated size, and current status so they can see their creative thundering herd without having to chase every idea around the house.
You can make the queue even more useful by separating projects into categories such as “Want to Try,” “Supplies Needed,” “In Progress,” “Almost Finished,” and “Completed.” This creates a visual workflow that helps makers decide what deserves attention next instead of starting another project every time a pretty macramé photo appears on their screen. That’s a Good Thing because a creative person can absolutely have 19 exciting ideas and still need somebody to gently say, “Perhaps finish one first, dear.”
Way 2: Connect Supplies to Specific Projects
Many craft planners have generic inventory pages, but you can make yours more useful by connecting supplies directly to projects. Instead of simply recording “white cord, 3 mm,” give the maker a place to note which project uses it, how much was purchased, how much remains, and whether more needs to be ordered. This turns a basic supply list into a practical planning tool that can help reduce the mystery surrounding those bags of cord sitting in the corner.
You can also include a “Use What I Have” planning page where makers list supplies they already own and brainstorm projects that could use them. This is particularly helpful for people who have accumulated cords, beads, rings, dowels, and decorative pieces over time. Suddenly, that random collection of thingees isn’t random anymore, and that’s always a Good Thing.
Way 3: Add a Finished Project Library
Don’t let your planner stop when a project is finished. Create a finished-project library where makers can record the completed piece, date finished, materials used, final dimensions, pattern source, time spent, and notes about what they would do differently next time. Include room for a photograph so the planner can slowly become a visual record of their creative journey.
This feature can become especially powerful for experienced makers and people who sell their work. They can use the finished-project pages to remember successful designs, color combinations, materials, and production details when they want to create something similar later. Over time, the planner becomes a personal reference library, which gives customers a reason to keep using it long after the first project is complete.
3 Nifty Ways to Find Customers
Way 1: Create “What I’m Making” Content
Macramé is naturally visual, so use that to your advantage when marketing your planner. Create content showing a project moving from inspiration to materials to knotting to finished piece, and explain how a planner can help organize each stage. You don’t need to constantly show the entire product because demonstrating the problem and the solution can be much more interesting than repeatedly announcing that your planner exists.
For example, create a short post showing how you plan a wall hanging before cutting any cord. Then show the project sheet, supply checklist, measurements, and progress tracker you used. You’re teaching something useful while quietly demonstrating why your product exists, and that is much more appealing than standing on a digital sidewalk waving a sign that says “BUY MY PDF!”
Way 2: Offer a Free Macramé Project Sheet
Create a simple free project planning sheet that makers can download in exchange for joining your email list. Include the most important fields, such as project name, materials, measurements, pattern reference, start date, and notes. Then introduce your expanded planner as the next step for makers who want project queues, supply tracking, cost pages, finished-project libraries, and additional worksheets.
The free sheet gives people a chance to experience your design and organization style before buying. It can also attract exactly the kind of person who is likely to appreciate your larger product, because someone who wants a project planning sheet has already demonstrated an interest in organizing their macramé projects. Build the relationship through helpful emails and useful creative tips, and your audience becomes much warmer than a random crowd wandering past your storefront.
Way 3: Market to Makers Who Sell Their Work
Don’t limit your audience to hobbyists. Macramé makers who sell finished pieces may need additional tools for tracking material costs, production time, inventory, custom orders, craft-fair preparation, product photography, and pricing notes. A business-focused version of your planner could give you an entirely new product angle without requiring you to abandon the hobby audience.
You could create content around practical organization questions such as “How to Track the Materials Used in Handmade Macramé,” “How to Organize Custom Macramé Orders,” or “What to Record When You Finish a Handmade Product.” These topics naturally lead toward your planner because you’re helping makers solve the organizational problems that become more important as their creative activity grows. You’re not promising that better records will automatically create a successful business, but you’re giving makers tools that can help them make better-informed decisions.
3 Takeaways You Won’t Find Elsewhere!
Takeaway 1: Record the Tiny Details You Think You’ll Remember
Makers often assume they’ll remember the details of a successful project, especially when they are excited about finishing it. Six months later, they may remember that the piece looked fantastic but have absolutely no idea which cord size they used, how long the finished piece was, or what combination of materials created the result. Your planner can encourage users to capture those little details immediately while the project is still fresh in their minds.
Add a “Details Worth Remembering” section to every project record. It could include favorite materials, measurements, color combinations, pattern adjustments, unexpected problems, and ideas for a future version. These notes can become incredibly valuable when a maker wants to recreate, modify, or improve an earlier design, and that’s a Good Thing.
Takeaway 2: Track Why a Project Was Paused
Here’s a surprisingly useful feature that many planners overlook: ask why a project stopped. Maybe the maker ran out of cord, became unsure about the pattern, lost interest in the design, needed a different tool, or simply got distracted by a shiny new project. Knowing why something was paused can help the maker decide whether to restart it, modify it, or move it permanently into the “Maybe Someday” pile.
You can create a simple “Paused Project Check-In” page with questions such as “What stopped me?” “What do I need to continue?” and “Do I still want to finish this?” This turns unfinished projects from guilt-inducing clutter into useful information. That’s always a Good Thing because nobody needs another planner that makes them feel guilty about being creative.
Takeaway 3: Celebrate Finished Projects
A project planner shouldn’t feel like an accounting spreadsheet wearing a craft-themed hat. Give makers opportunities to celebrate completed projects by recording a favorite detail, attaching a photograph, writing a short reflection, or marking the project as one they would happily make again. These pages can create a satisfying sense of progress and encourage customers to keep using the planner.
You can even add milestone pages for completing five, ten, or twenty projects. The artist or maker can look back and see how many pieces they have created, which themes they explored, and which projects became favorites. That turns organization into part of the creative reward, and it gives your product an emotional element that a plain checklist simply doesn’t have.
3 Common Mistakes to Avoid
Mistake 1: Making the Planner Too Generic
A generic craft planner can technically work for macramé, knitting, sewing, painting, or almost anything else, but that broad approach can make it harder to communicate why your product is special. Macramé makers have specific needs involving cord, knots, dimensions, patterns, hardware, fringe, and project variations. Designing around those details makes the planner feel like it was created by someone who understands the hobby rather than someone who simply changed the cover on a generic worksheet.
You don’t have to make every page intensely macramé-specific, though. Keep useful general sections such as notes, project planning, and reflections, then add specialized pages where they genuinely improve the workflow. The result should feel purpose-built without becoming so narrow that it only works for one particular type of wall hanging.
Mistake 2: Filling Every Page With Decorations
Macramé has beautiful textures and visual patterns, so it can be tempting to cover your planner in decorative borders, knots, tassels, plants, and elaborate illustrations. Unfortunately, every decorative element takes up space that could have been used for writing, recording measurements, or attaching a project photograph. Your goal is to make the planner attractive without making the actual planning experience feel like trying to write inside a decorative pillow.
Use visual elements strategically and keep the important information easy to find. Give users comfortable writing areas, clear headings, useful checkboxes, and enough room for project details. Pretty design attracts attention, but practical design earns repeat use, and repeat use is a Good Thing.
Mistake 3: Ignoring Different Types of Macramé Makers
Not every maker approaches macramé in the same way. One person may follow patterns exactly, another may design from scratch, another may create gifts, and another may sell finished pieces at markets or online. If your planner assumes that everyone uses the same process, you’ll miss opportunities to make the product flexible and useful.
Include optional sections that different users can ignore when they don’t need them. A pattern adjustment page might be valuable to one maker, while a cost-and-pricing page could be far more important to another. This modular approach lets you serve a wider audience without turning the planner into a giant thingee that requires a table of contents, an index, and possibly a sherpa.
Scaling Your Results
Once you’ve created your core macramé project planner, start looking for natural companion products. You could create separate project planners for wall hangings, plant hangers, keychains, bags, ornaments, home décor, or gift projects. You could also develop supply inventory sheets, cord calculators, project queue pages, finished-project journals, and craft-fair preparation planners as complementary products.
Your $7 starter product could provide the essential project planner, while a $17 version adds supply tracking, project queues, progress pages, and finished-project records. A $27 bundle could combine several specialized project planners, a $47 complete maker binder could include both creative and business organization tools, and a $77 library could bring together your best macramé planning resources in one comprehensive collection.
You can also create seasonal products that give your audience fresh reasons to return. A holiday macramé planner could focus on ornaments and handmade gifts, while a home décor collection could focus on wall hangings and plant holders. The key is to build related products that solve new problems for the same audience instead of producing random digital thingees simply because you had an energetic Tuesday afternoon.
A collection containing 40 well-designed macramé planning products could potentially generate an additional $700 to $2,200 per month through bundles, repeat customers, memberships, complementary offers, and related products, although actual results will vary based on traffic, pricing, product quality, audience fit, and marketing. There are no guaranteed sales hiding inside the pages, but a focused product catalog can give customers more useful ways to work with you over time. That’s a Good Thing because the goal is to build a business around solving related problems, not simply collecting PDFs like they’re rare trading cards.
Your Next Steps
Start by creating one excellent macramé project planning sheet and test it against a real project workflow. Make sure a maker can record the project idea, materials, measurements, pattern information, progress, and final notes without feeling cramped or confused. Then add the project queue and finished-project library because those two features can turn a basic worksheet into a complete organizational system.
Next, create your $7 starter version and one logical $17 upgrade. Don’t worry about building the $77 library on day one, because your first customers can teach you what additional pages are actually useful. Pay attention to the questions makers ask, the information they want to track, and the parts of your planner they mention most often.
Then begin creating helpful content around macramé organization. Show how to plan a project before cutting cord, how to keep track of supplies, how to record finished designs, and how to organize a growing project queue. Give away a useful mini project sheet, build your email list, and gradually introduce the larger planner collection to people who already understand why organization can make their creative time easier.
Most importantly, don’t wait until you have every possible page figured out. Start with one useful thingee, make it genuinely helpful, listen to your customers, and let their questions point you toward the next product. That’s it. That’s your beginning!
Final Thoughts
Macramé project planners have a lovely opportunity because they combine organization with something people already enjoy doing. A maker can use one to capture an idea, plan the materials, record measurements, track progress, document the finished piece, and remember the little details that would otherwise disappear into the creative fog. You’re giving them structure without taking away the freedom and fun that make handmade projects so appealing.
The strongest product won’t simply be a collection of boxes labeled “Project Name” and “Notes.” It will understand the real workflow of a maker and help them move from idea to finished piece while keeping supplies, patterns, measurements, costs, and future projects organized along the way. Add thoughtful touches such as a project queue, paused-project check-ins, finished-project celebrations, and a personal design library, and you’ve created something that can become a genuine creative companion.
From there, the product ladder becomes wonderfully flexible. Start with a simple planner, expand into specialized project workbooks, create bundles, add business-focused pages, and eventually build a comprehensive macramé maker library. Keep improving the thingees that customers actually use, keep your designs practical as well as pretty, and remember that helping a maker finish one more project is a much more compelling goal than simply selling another printable.
If you were creating your first macramé project planner tomorrow morning, what would you want it to help you remember when the cords are tangled, the pattern has disappeared somewhere in your phone, and three new project ideas are demanding immediate attention? Would you start with a project tracker, a supply organizer, a project queue, or a finished-project library? Pick one clear problem, build one genuinely useful solution, and then let that first little planner show you where the next opportunity is hiding.
Enjoy!